
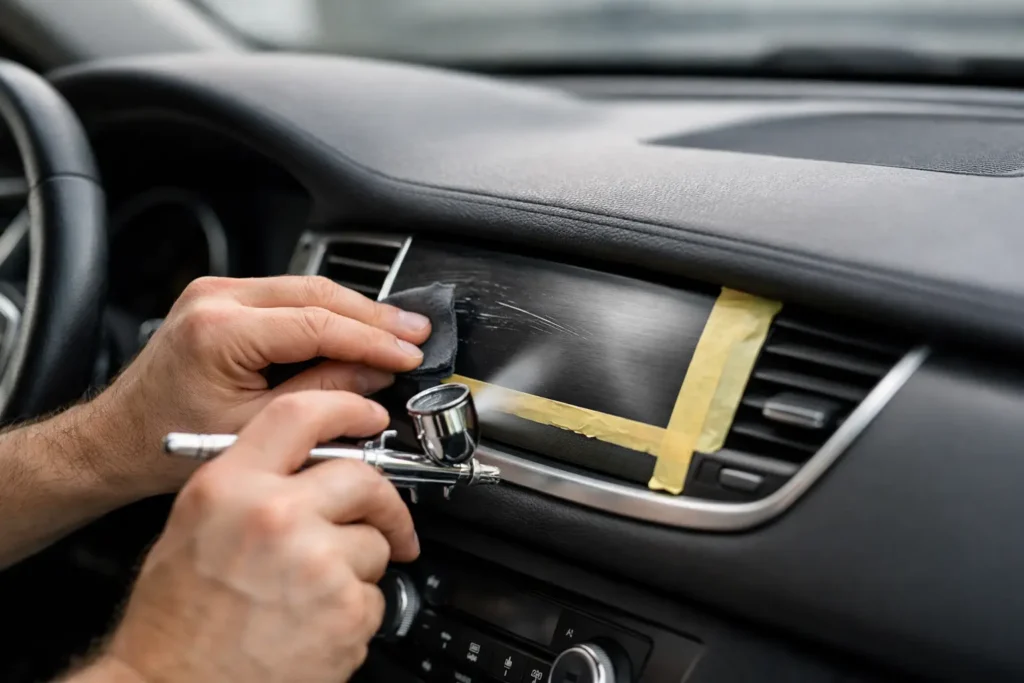
A scratched dash bezel can make an otherwise clean interior look tired every time you get behind the wheel. Learning how to repaint scratched dashboard trim can produce an excellent result, but only when the trim is properly identified, repaired, cleaned, coated, and cured. Skipping one of those stages is why many DIY trim repairs peel, stay tacky, or look noticeably different from the surrounding interior.
The first decision is whether repainting is the right repair. Painted plastic trim, vinyl-coated trim, and some soft-touch finishes can often be restored successfully. Genuine wood, hydro-dipped woodgrain, real carbon fiber, chrome-plated pieces, and badly degraded soft-touch coatings may require a different process. The goal is not simply to cover the scratch. It is to rebuild a finish that looks correct, feels right, and holds up to heat, handling, cleaners, and daily use.
Identify What Your Dashboard Trim Is Made Of
Dashboard trim is not all the same, even within one vehicle. A black satin plastic bezel may sit directly beside a painted metallic accent, a rubberized soft-touch panel, or a lacquered woodgrain insert. Each surface needs a compatible repair method.
Start by looking at the damaged area under strong, direct light. If the scratch is white or gray underneath, the color may be molded into the plastic and the scratch has cut into the surface. If color flakes away to reveal a different layer, the piece is painted or coated. A rubbery feel usually indicates soft-touch material, while a glossy, deep finish may be painted, clear-coated, woodgrain, or carbon fiber.
This matters because paint adhesion depends on the substrate. Standard aerosol paint on flexible interior vinyl can crack. A heavy primer on textured plastic can fill the grain and leave the repaired area looking too smooth. On real wood or carbon fiber, an improper sanding step can permanently damage the decorative layer.
If you cannot confidently identify the material, remove the part and inspect its back side for markings. Most molded plastic pieces include a material code. For rare, high-value, vintage, or luxury trim, it is often smarter to preserve the original part and have it professionally refinished rather than experiment on a difficult-to-replace component.
How to Repaint Scratched Dashboard Trim: Prep First
A durable finish is built during prep, not during the final paint pass. Remove the trim whenever practical. Masking around an installed dashboard can work for a tiny repair, but overspray, edge lines, and poor access are common problems. Removal also lets you clean behind switches, vents, and trim edges where oils and silicone dressings collect.
Before sanding, wash the piece with mild soap and water. Dry it completely, then wipe it with a dedicated wax and grease remover or a plastic-safe surface cleaner. Avoid household cleaners that leave fragrance, silicone, or protectant residue. Those products can cause fisheyes, where paint pulls away into small craters.
For shallow scuffs, use a gray ultra-fine abrasive pad or fine sandpaper around 800 to 1,000 grit. You are not trying to carve out the scratch. You are creating a uniform surface with enough tooth for the new coating to grip. Keep pressure light, especially around sharp edges and molded texture.
For a deeper gouge, feather the damaged area with 600 to 800 grit first. If the scratch can catch a fingernail, paint alone usually will not hide it. Use a flexible plastic repair filler made for interior components, applying only enough to level the damaged section. Once cured, sand it gradually until the repair disappears into the panel. A rigid body filler is a poor choice for trim that flexes, because it can crack later.
After sanding, remove dust thoroughly. Blow out seams and textured areas, wipe again with surface cleaner, and handle the part with clean gloves. Finger oils are enough to affect adhesion on a small bezel or console panel.
Choose a Coating That Matches the Interior
Interior trim needs more than the closest color on a store shelf. The sheen must also match. Most factory dashboards use low-gloss, satin, eggshell, or matte finishes because high gloss creates windshield reflections and makes plastic look obviously repainted.
Use a quality adhesion promoter when coating bare plastic, particularly polypropylene and similar low-surface-energy plastics. Apply it in light, even passes according to its flash-time instructions. This thin layer is not a substitute for cleaning or sanding, but it can make the difference between a coating that lasts and one that lifts at the edges.
For color, choose an automotive interior coating or trim dye designed for plastics and vinyl. These products remain more flexible than ordinary enamel and are better suited to temperature swings inside a closed vehicle. If the trim is a painted metallic, piano black, body-color accent, or other hard finish, an automotive basecoat and compatible clear coat may be appropriate. The correct system depends on the original finish and the look you want to preserve.
Color matching deserves patience. Black interiors alone can include charcoal, blue-black, warm black, and several sheen levels. Test your coating on an inconspicuous area or a separate plastic sample before spraying the actual trim. On a factory restoration, a close color with the wrong gloss can look worse than a visible scratch.
Apply Light Coats, Not One Heavy Coat
Set the part on a clean stand or hang it so you can reach the edges. Spray in a dust-controlled, well-ventilated area at the temperature range recommended by the coating manufacturer. Cold panels, high humidity, and poor airflow can affect how the finish levels and cures.
Apply the first coat as a light tack coat. It should look thin and slightly uneven. Let it flash, then apply additional light-to-medium coats until coverage is even. Heavy wet coats are tempting because they cover fast, but they are more likely to run, puddle in texture, trap solvent, or soften the original finish beneath.
Keep the can or spray gun moving and overlap each pass consistently. Change direction on the next coat to avoid striping. On textured trim, use just enough material to restore color without filling the factory grain. If you cover the texture with a thick paint film, the repair may be durable but it will not look factory correct.
Clear coat is not always necessary. Many interior coatings are formulated to provide their own final sheen, and adding clear can make the piece too glossy or less flexible. Use a compatible low-gloss clear only when the original finish calls for it or when the coating system specifies it.
Let the Finish Cure Before Reinstalling
Dry to the touch does not mean cured. Interior coatings can feel dry within an hour yet remain vulnerable to fingerprints, clips, cleaning chemicals, and heat for much longer. Follow the product’s stated cure time, and give the part extra time when conditions are cool or humid.
Do not install trim while the finish is still soft. Retaining clips can leave pressure marks, and a tight bezel can chip at the mounting points. Reinstall carefully using plastic trim tools, then avoid dressings and aggressive cleaners for the first several weeks. A damp microfiber towel and mild interior cleaner are usually all that is needed for routine maintenance.
When a Professional Refinish Is the Better Value
DIY repainting works best on common plastic trim with moderate scratches and a straightforward satin or matte finish. It becomes less predictable when the part is rare, heavily textured, soft-touch, metallic, woodgrain, carbon fiber, or part of a luxury interior where a slight color difference is obvious.
Professional refinishing is also worth considering when scratches are accompanied by peeling coatings, cracks, broken mounting tabs, UV fading, or previous repair attempts. Those issues require more than paint. They require substrate repair, material-specific preparation, precise color adjustment, and controlled curing.
Craft Customs restores dashboard trim and related interior components in-house for owners who want factory-new accuracy or a deliberate custom upgrade. That can mean matching the original color and sheen, refinishing faded woodgrain, converting trim to carbon fiber, or creating a coordinated interior finish that complements a reupholstered steering wheel, console, or shifter.
A well-repainted dashboard trim piece should disappear into the cabin rather than announce that it was repaired. Take the time to identify the material, correct the damage beneath the coating, and match both color and sheen. If the part matters to the vehicle’s value or the finish needs to be exact, protecting the original with a specialist refinish is often the best move.