
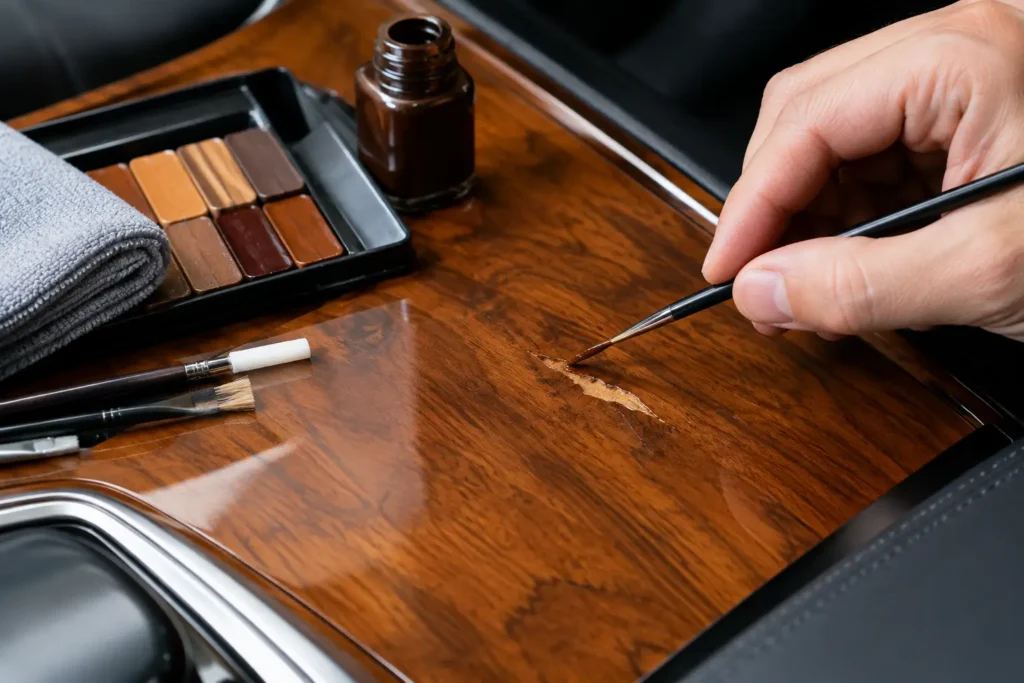
A glossy wood dash can make a well-kept vehicle feel tailored and expensive. A cloudy, cracked, or peeling one does the opposite. This automotive wood veneer repair guide explains how to identify the damage you are seeing, what can realistically be corrected, and when a professional refinish is the safer choice for preserving the part and the vehicle’s value.
Wood trim deserves a different approach than painted plastic, leather, or carbon fiber. The surface may look simple, but many factory pieces are built in layers: a substrate, a thin wood veneer or printed woodgrain layer, stain or tint, and a clear protective coating. Damage can be isolated to the topcoat, or it can reach through the veneer itself. The correct repair depends on knowing the difference before any sanding, filling, or coating begins.
Start With the Construction of the Trim
Not every brown, glossy interior panel is genuine wood veneer. Luxury vehicles, classics, and higher-trim models may use a thin slice of real wood beneath a clear finish. Other vehicles use molded plastic with simulated grain, a printed decorative film, hydrographic trim, or a coated composite panel. Each can look convincing from the driver’s seat, but each requires a different restoration process.
Real veneer has directional grain that varies naturally from panel to panel. It may be book-matched across a dash or console, meaning the left and right sections mirror one another. Simulated woodgrain tends to repeat its pattern and often has no visible depth at an edge, opening, or mounting point. If you are unsure, avoid testing the surface with aggressive abrasives. A small mistake can turn a refinishable panel into a replacement problem.
The age of the vehicle matters too. Older European and American luxury cars often have thicker, more repairable clear finishes over real veneer. Some modern trim has a much thinner decorative layer, leaving little room for correction. That is why two pieces with the same visible scratch may call for completely different repair methods.
Automotive Wood Veneer Repair Guide: Diagnose the Damage
A proper diagnosis begins under clean, even lighting. Wipe the part with a clean microfiber cloth and a mild interior-safe cleaner first. Dust, skin oils, silicone dressings, and residue can make clear-coat damage look worse or hide the true edge of a crack.
Clouding, hazing, and dullness
Clouding is often a failure in the clear finish rather than the wood below it. UV exposure, heat cycles, harsh cleaners, and moisture can degrade the coating until it loses clarity. Light haze may respond to careful polishing if the finish is still stable. If the surface feels rough, shows tiny cracks, or turns milky beneath the clear, polishing can make the problem more obvious rather than solve it.
On vintage trim, a yellowed clear coat may also alter the apparent color of the wood. Removing and replacing that finish can restore depth and warmth, but it must be done evenly across matching pieces. Refinishing only one section of a large dash can leave a visible color mismatch.
Scratches and chips
A scratch that catches a fingernail has likely passed through the clear coat. Fine surface scratches can sometimes be leveled and polished, provided there is enough coating thickness remaining. Chips are more involved because the repair must rebuild a smooth surface, match the color beneath it, and blend into the surrounding grain.
Touch-up products can reduce the appearance of a small defect, but they rarely create a factory-level result on highly visible trim. They can also darken over time, shrink, or leave a glossy spot that stands out at an angle. This is especially noticeable on steering wheel wood sections, console lids, and dash trim directly in the driver’s line of sight.
Cracked, lifting, or missing veneer
Cracks that run through the wood layer are structural cosmetic damage, not merely a finish issue. Veneer may split as the substrate expands and contracts, after an impact, or when adhesives fail with age. Lifted edges and bubbling indicate that the veneer is separating from its backing. Those areas need to be stabilized before any refinishing work begins.
Missing veneer creates the greatest challenge. A skilled repair may involve replacing a small section with compatible wood, shaping it to match surrounding contours, re-creating the grain direction, and tinting the repair before clear coating. The goal is not simply to fill a hole. It is to make the panel read as one continuous material.
Peeling or cracking clear coat
Peeling clear coat is common on sun-exposed dash and door trim. Once the coating starts releasing, applying another clear layer over it is not a durable repair. The failed material must be removed carefully, the underlying finish evaluated, and the surface prepared for a new coating system.
Do not pick at a peeling edge or sand one spot aggressively. Veneer is thin, and sanding through it exposes the substrate beneath. Once that happens, the repair becomes more complex and may require localized veneer replacement or a complete custom finish.
Know When a DIY Repair Is Reasonable
A careful owner can safely improve minor grime, fingerprints, and some very light surface marks. Use gentle products, soft microfiber towels, and minimal moisture around seams and edges. Keep silicone-heavy dressings off wood trim. They create temporary shine but can contaminate the surface and complicate future refinishing.
DIY work becomes risky when there are cracks, chips, lifting material, discoloration under the finish, or deep scratches. It is also risky when the trim is rare, heavily contoured, book-matched, or part of a high-value classic, luxury, or exotic interior. The cost of a professional repair is often lower than sourcing an unobtainable replacement after an unsuccessful home attempt.
Avoid household furniture polish, heavy rubbing compounds, nail polish remover, and harsh solvents. Wood furniture products are not designed for the heat, UV exposure, and material combinations found in an automotive cabin. A product that looks good for a weekend can leave residue, soften a failing finish, or create fish-eye defects during later clear coating.
What a Lasting Professional Repair Involves
Quality woodgrain restoration is a process of controlled correction, not a quick cosmetic cover-up. The part is first inspected for substrate damage, loose veneer, prior repairs, and finish thickness. Any lifting veneer must be secured. Cracks, chips, and missing sections are repaired before the final surface work starts.
The existing clear coat is then leveled or removed as needed without cutting through sound veneer. Color work comes next. This may mean preserving the original wood tone, correcting UV fade, tinting repaired areas, or changing the appearance for a custom build. A clear coating system is applied to provide depth, gloss, and protection, then cured and finished to the desired sheen.
The best result depends on matching more than color. Grain direction, transparency, gloss level, edge coverage, and the way adjoining panels reflect light all matter. On a full interior set, refinishing pieces together is often the smarter choice because it produces consistent tone across the dash, console, door trim, and steering wheel accents.
Removal and Shipping Matter More Than Most Owners Expect
Many wood trim pieces are damaged during removal, not while they are installed. Hidden screws, brittle clips, airbag-adjacent components, and aged mounting tabs require patience. Photograph the trim before removal and label hardware so reinstallation is straightforward. If a panel has electronics, switches, vents, or chrome accents, protect those areas from pressure and loose packing material.
For send-in restoration, wrap each part individually and immobilize it in a sturdy box. Do not allow trim pieces to touch each other in transit. The corners and thin edges of veneer panels are particularly vulnerable. Include clear notes about the vehicle year, make, model, trim location, and whether you want an original-style restoration or a different custom finish.
Craft Customs restores woodgrain trim and related interior components in-house, allowing each piece to be evaluated and refinished around its actual condition rather than treated as a one-size-fits-all job. That matters when a repair must match factory character, complement a custom steering wheel, or bring a complete interior back to a factory-new appearance.
Protect the Finish After Restoration
Once restored, wood trim benefits from simple habits. Use a sunshade when the vehicle is parked, particularly in hot climates. Clean with a lightly damp microfiber towel and a mild interior cleaner approved for finished trim. Dry the surface promptly and keep alcohol-heavy products, strong degreasers, and abrasive pads away from the clear coat.
Most importantly, address new damage early. A small clear-coat chip is far easier to stabilize than a chip that lets moisture reach the veneer. The right repair does more than make a dash look better for photos. It restores the finish, feel, and level of care that make the whole cabin worth sitting in.