
A steering wheel can be mechanically perfect and still make the entire cabin feel worn out. The same goes for a cracked armrest, faded seat bolster, or peeling leather shift boot. The best leather restoration methods are not one-size-fits-all fixes. The right process depends on whether the leather is dirty, dry, faded, scratched, torn, stretched, or simply beyond saving.
For vehicle interiors, appearance matters, but so does feel. A proper restoration should bring back an even color, a natural grain, and the firm yet comfortable texture the part had when it was new. The goal is not to cover damage temporarily. It is to correct the underlying condition and create a finish that holds up to hands, heat, friction, and daily use.
Start With an Honest Condition Check
Leather is often blamed for problems caused by surface contamination, failed coatings, or old repair products. Before choosing a method, inspect the part in good light. Dirt and body oils usually create dark, glossy areas on steering wheels, armrests, and driver seat bolsters. Fading looks flatter and lighter, while worn color often exposes a different shade beneath the topcoat.
Cracks require closer attention. Fine surface cracking may be limited to the protective coating and color layer. Deeper cracks, splits, missing material, loose stitching, or foam damage point to a more involved repair or reupholstery job. A part that feels stiff, brittle, or thin has often lost structural integrity. No conditioner can rebuild leather that has been worn through.
This distinction saves money and prevents disappointment. Cleaning a dirty wheel may make it look dramatically better. Dyeing a wheel with failed leather beneath the finish will not provide a lasting result.
The Best Leather Restoration Methods, Matched to Damage
1. Deep cleaning for grime, oils, and surface buildup
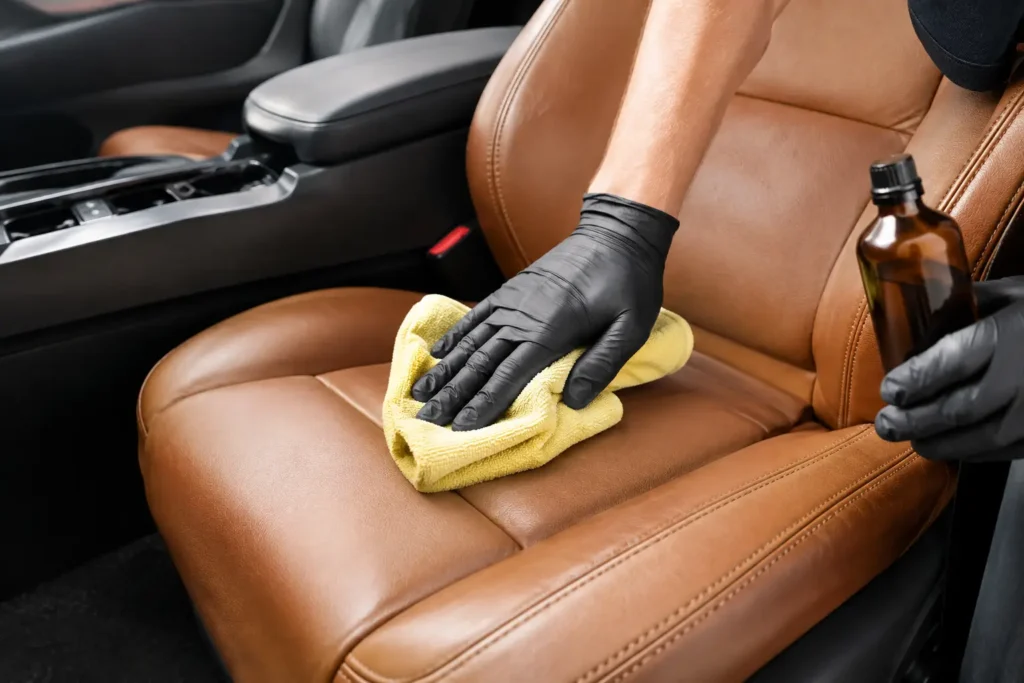
Professional-grade cleaning is the first step in nearly every leather restoration. It removes oils, silicones, lotions, embedded dirt, and residue that can prevent dyes or coatings from bonding properly. On a steering wheel, this process can reduce the slick, shiny feel that develops after years of driving.
Cleaning is the correct solution when the original color is still intact and the leather has no meaningful cracking or material loss. It is also necessary before conditioning, repair, or refinishing. The trade-off is simple: cleaning improves the surface, but it cannot restore faded pigment or repair a split seam.
Avoid soaking automotive leather. Excess moisture can affect adhesives, padding, stitching, and the components beneath the leather. Gentle cleaning with the right product and controlled drying is far safer than aggressive scrubbing or household degreasers.
2. Conditioning for leather that is dry but still sound
Conditioning helps maintain supple leather after it has been cleaned. It is most useful on leather that feels dry or slightly stiff but remains structurally healthy. A quality conditioner can improve the tactile feel of seat leather, shift boots, handbrake boots, and older steering wheel leather when used appropriately.
Conditioning is maintenance, not reconstruction. It will not fill cracks, recolor faded areas, or stop peeling coatings. In fact, applying heavy conditioners to a worn or coated surface can make later refinishing more difficult because the oils may interfere with adhesion.
For modern automotive interiors, less is often more. Many factory leathers have protective finishes that do not absorb conditioner like traditional aniline furniture leather. The goal is to preserve flexibility without leaving a greasy surface that attracts dirt.
3. Leather filler for shallow cracks and small gouges
When the leather itself has shallow cracks, abrasions, or small missing spots, flexible filler can level the damaged area before color is applied. This method is common on worn steering wheel grips, seat bolsters, console lids, and armrests where repeated contact has broken down the surface.
The repair depends on preparation. The damaged area must be cleaned, stabilized, and feathered so the filler transitions naturally into the surrounding leather. Applied in thin layers, then shaped and textured correctly, filler can make light-to-moderate damage far less visible.
The limitation is durability on heavily flexed or deeply damaged areas. A large split in a driver seat bolster or a steering wheel with deteriorated leather may flex beyond what a filler repair can reliably handle. That is when a new leather wrap is the stronger long-term choice.
4. Color restoration for fading, scuffs, and worn finish
Color restoration is one of the most effective ways to revive an interior that looks tired but still has usable leather underneath. It involves carefully preparing the surface, correcting defects, applying a matched leather color, and protecting it with the appropriate topcoat. Done correctly, it restores a consistent factory-style sheen rather than an overly glossy painted look.
This process works well for faded steering wheels, scuffed armrests, discolored console lids, and leather trim with worn contact points. Precise color matching is critical. Black is not always just black, and factory interiors can include charcoal, ebony, graphite, dark brown, saddle, gray, or custom tones that look noticeably different side by side.
A quality finish must be flexible and properly cured. Rushed dye jobs often fail at the high-touch areas first, leaving peeling edges, uneven shine, or color transfer. For a part handled every time you drive, preparation and coating quality matter as much as the color itself.
5. Stitch repair for opened seams and loose thread
Stitching is both functional and visual. Loose, broken, or separated seams can make otherwise good leather look neglected, particularly on steering wheels, shift boots, armrests, and performance seats. If the leather panels are still healthy, restitching can preserve the original material and factory layout.
Matching the thread color, stitch spacing, tension, and pattern is where the quality shows. A poorly repaired seam can pull unevenly, distort the leather, or stand out immediately against original stitching. Specialty work is especially valuable on contrast stitching, tri-color M stitching, baseball stitching, and vintage wheel patterns.
If the seam opened because the leather has shrunk, hardened, or torn along the stitch holes, stitching alone may not be enough. The leather may need reinforcement or replacement to prevent the damage from returning.
6. Partial leather replacement for localized damage
Partial replacement makes sense when one section is beyond repair but the rest of the part remains in excellent condition. For example, a single damaged steering wheel grip section, a torn armrest panel, or a worn seat insert may be replaced without rebuilding the entire component.
The challenge is matching more than color. Grain pattern, thickness, softness, stitching, and age all affect whether the repair blends in. On a sun-faded interior, brand-new leather can look too rich next to original panels unless the repair is planned with the overall finish in mind.
This method can be a smart balance between cost and preservation, especially for rare original interiors. It is less appropriate when multiple areas are cracked or when the leather has deteriorated across the full part.
7. Complete reupholstery for severe wear or a custom upgrade
Reupholstery is the best answer when leather is torn through, severely cracked, stretched, hardened, or previously repaired too many times. It replaces the worn covering with new material and allows the component to be rebuilt around the correct shape, stitching pattern, and grip profile.
For steering wheels, complete rewrapping can return a thin, slick, damaged rim to a tight, premium feel. It also creates room for purposeful upgrades such as perforated leather, Alcantara-style suede, contrast stitching, thicker grips, carbon fiber sections, or a different color scheme. The best custom work still respects the fitment, controls, and design language of the vehicle.
At Craft Customs, restoration and customization are handled in-house so the process can be matched to the part rather than forced into a generic repair. That matters for classic wheels, luxury interiors, uncommon colors, and components that need both material repair and finish correction.
When DIY Leather Repair Is Enough
A careful owner can handle routine cleaning and light conditioning on healthy leather. Small surface scuffs may also respond well to a quality repair kit if the color match is close and expectations are realistic. DIY work is most successful when the issue is minor and the part is not a highly visible centerpiece.
Steering wheels, dashboards, armrests, and vintage components raise the stakes. These pieces receive constant contact, are difficult to color-match, and can be expensive or impossible to replace. An uneven repair on a wheel is visible every time you get in the vehicle. On collector, exotic, or high-value vehicles, professional restoration is usually the better value because it protects both the appearance and the originality of the interior.
Protect the Repair After Restoration
Once leather has been restored, regular cleaning is more valuable than repeated heavy conditioning. Wipe down high-touch areas before oils build up, keep sharp objects away from seat bolsters, and use a sunshade when possible to reduce heat and UV exposure. Avoid harsh cleaners, alcohol-heavy products, and glossy dressings that leave leather slippery or artificially shiny.
The best restored interiors do not look freshly painted or overly treated. They look correct. Whether your goal is factory-new accuracy or a fully custom cabin, choose the restoration method that fixes the actual damage, then protect the work so every drive continues to feel like the upgrade was worth it.