That shiny wear spot at 10 o’clock, the cracking along the rim, the faded leather, the peeling woodgrain – none of it stays hidden once your hands are on the wheel. A proper steering wheel restoration process guide starts with one fact: this is the most touched surface in the cabin, so cosmetic damage and structural wear show up here first and affect the whole driving experience.
A worn steering wheel does more than make the interior feel older. It changes grip, reduces driver comfort, and drags down the perceived value of the vehicle. On a classic car, poor restoration can also erase original character. On a late-model performance or luxury vehicle, the wrong materials or stitching can make the interior look cheap fast. That is why steering wheel restoration is not one job. It is a sequence of decisions based on the wheel’s construction, the level of damage, and whether the goal is factory-correct restoration or a custom upgrade.
What a steering wheel restoration process guide should actually cover
Many owners assume the job is just sanding and rewrapping. Sometimes it is that simple, but often it is not. Modern and vintage steering wheels can include leather, molded foam, hard plastic, painted trim, genuine wood, simulated woodgrain, carbon fiber sections, thumb grips, heating elements, switch cutouts, and airbag-related fitment tolerances. Each one changes the repair path.
The real process begins with identifying what the wheel is made from and what failed. Cracked leather and smooth glossy wear are surface issues. Loose padding, split seams, warped wood, deep gouges, and deteriorated substrates point to deeper reconstruction. Restoring the finish without correcting the base material usually gives short-term improvement and long-term disappointment.
Inspection comes first
A quality restoration starts with close inspection under strong lighting. The wheel is checked for leather shrinkage, seam separation, foam degradation, hardening, discoloration from oils or UV exposure, and any previous repair work. Older wheels can also show ring cracks in plastic or resin sections. Wood wheels may have clear coat failure, lifting grain, or hairline splits that need to be stabilized before refinishing.
This stage matters because two wheels with similar cosmetic wear may need completely different treatment. One may only need fresh leather and color correction. The other may need structural repair to the rim before any upholstery work begins. If a wheel has been poorly filled, dyed, or wrapped before, those shortcuts usually have to be removed first.
Why material type changes the process
Leather-wrapped wheels need a different approach than painted sport wheels or wood and leather combination wheels. If the original leather is heavily worn but the foam core is solid, rewrapping is often the best long-term answer. If the wheel has a wood top and bottom section, the wood may need stripping, crack repair, sanding, and clear refinishing while the side grips are reupholstered separately.
That is also where customization can naturally enter the process. Some owners want factory style. Others want thicker grips, perforated leather, suede sections, contrast stitching, paint-matched trim, or carbon fiber conversion. The best time to make those choices is before teardown, not halfway through the job.
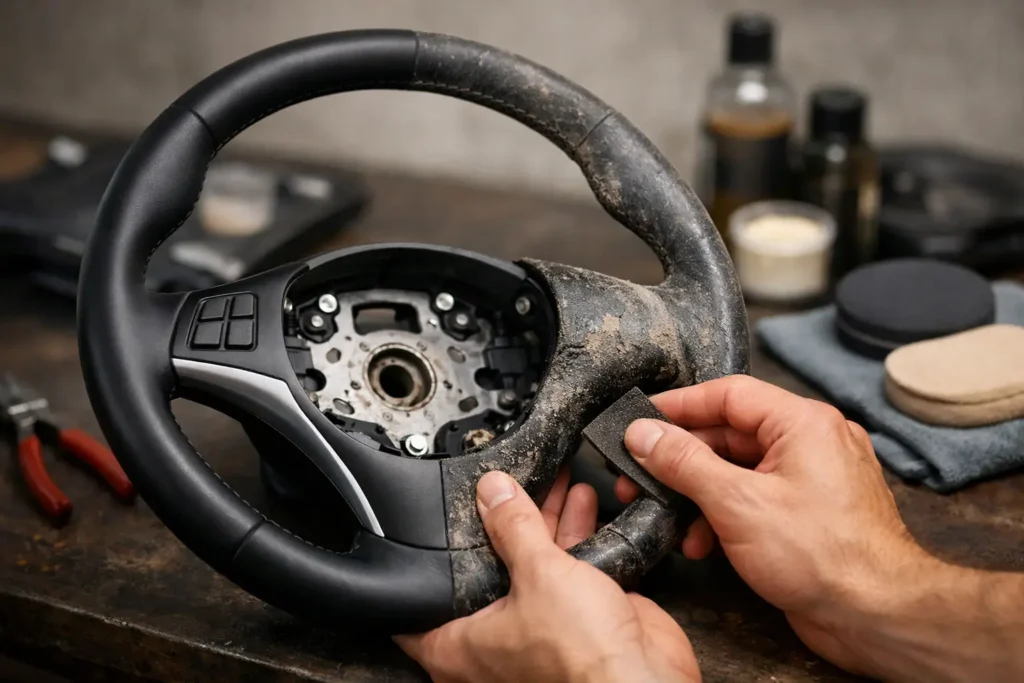
Disassembly and surface preparation
Once the wheel is evaluated, trim pieces and old coverings are removed as needed. Preparation is where quality work separates itself from quick cosmetic repair. Old adhesive, loose material, body oils, failed finish, and filler residue all have to go. Any contamination left behind affects adhesion, color consistency, and final texture.
For leather wheels, removing the old wrap without damaging the underlying structure is critical. The foam shape underneath controls how the finished wheel feels in the hand. If that core has flat spots, cracks, or soft sections, those issues are repaired before new material is installed. For hard-surface wheels, sanding and cleaning must be controlled carefully so the original contours and switch areas stay true.
Repairing the underlying wheel structure
This is one of the most overlooked parts of the restoration process. A wheel can look worn because the finish failed, but it can also feel wrong because the structure underneath has changed. Foam can compress over time. Hard materials can chip. Wooden sections can split or develop uneven surfaces under old clear coat.
Rebuilding those areas takes precision. Too much filler changes the shape. Too little leaves low spots that show through the finish or leather. On high-end and collector vehicles, the restored wheel should feel correct in diameter, contour, and grip profile. That is not just aesthetics. It affects driving feel every time the vehicle is used.
Refinishing, dyeing, or rewrapping
At this point, the restoration path becomes more specific. If the wheel is leather-wrapped, new upholstery is often the strongest result when the original skin is torn, overly smooth, cracked, or badly faded. New leather can return the right grain, improve tactile quality, and hold up better than a heavy recoloring of damaged material.
If the original covering is still structurally sound, refinishing or dyeing may be possible. This depends on the age of the wheel, how severe the wear is, and whether color change is involved. Surface refinishing can work well on minor wear, but it is not the same as rebuilding a heavily damaged wheel. That trade-off matters. A less invasive process may preserve more original material, but it will not always deliver the same durability as a full rewrap.
For wood or simulated wood sections, the process usually includes stripping failed topcoat, correcting surface defects, then rebuilding and sealing the finish. The final gloss level matters. Too glossy can look artificial. Too flat can make premium trim look unfinished. Matching the original tone and depth takes experience, especially when one wheel has to visually align with surrounding dash and console trim.
Stitching, color, and finish details
This is where a steering wheel restoration process guide becomes practical for owners comparing options. The visible details determine whether the finished piece looks factory new or obviously redone. Stitch pattern, thread color, leather grain, padding thickness, and sheen all need to work together.
A custom setup can look exceptional when it fits the interior. Black perforated leather with smooth side bolsters, a thicker sport grip, or a color-matched center trim can modernize the cabin without looking out of place. But customization still has to respect the vehicle. A show build has more flexibility than a numbers-matching classic or a high-end lease return where factory appearance is the priority.
Quality control and fitment checks
A wheel can look great on the bench and still fail if the seams are uneven, the leather is over-tensioned, the trim gaps shift, or the contour changes enough to affect reinstallation. Final inspection should include surface consistency, seam alignment, material adhesion, and finish uniformity across all sections.
Fitment matters more than many owners realize. Steering wheels are not forgiving components. Buttons, bezels, airbags, paddle openings, and rear covers all depend on exact tolerances. Added material thickness in the wrong place can interfere with trim seating or make the wheel look bulky. That is why experienced restoration work stays controlled and measured from start to finish.
Factory-correct restoration vs custom upgrade
The right answer depends on the car and how you use it. A collector-grade restoration usually calls for factory-correct leather texture, original stitch style, proper gloss level, and period-appropriate materials. That protects authenticity and resale value.
A daily driver or performance build may benefit more from upgraded materials and grip shape. Thicker bolsters, perforated leather, suede inserts, or carbon fiber accents can improve feel and refresh a dated interior. Neither path is automatically better. The key is matching the work to the vehicle, the owner’s goals, and the level of finish expected throughout the cabin.
What owners should know before sending a wheel out
Photos are useful, but they do not always reveal structural issues. A wheel that looks mildly worn can have deeper substrate damage once the cover comes off. That can affect labor, materials, and turnaround. It is better to plan for that possibility than assume every wheel only needs cosmetic work.
It also helps to think beyond the steering wheel itself. If the wheel is being restored to factory-new condition, worn shift knobs, e-brake handles, armrests, or dash trim can suddenly stand out. Many owners choose to restore related touchpoints at the same time so the interior feels consistently finished rather than partly renewed.
For send-in service, careful packing matters. The part should arrive protected from pressure damage, especially if it includes fragile wood sections or delicate trim. Clear communication about vehicle year, make, model, desired material, color, stitch style, and finish level helps the restoration stay accurate from the start. Shops that handle this work in-house, like Craft Customs, are usually best positioned to control consistency across materials and customization options.
A steering wheel is small compared to the rest of the interior, but it has an outsized effect on how a vehicle feels every mile. When the restoration is done correctly, the result is not just a better-looking part. It is a cleaner cabin, a stronger first impression, and a wheel that feels right the moment your hands land on it.