
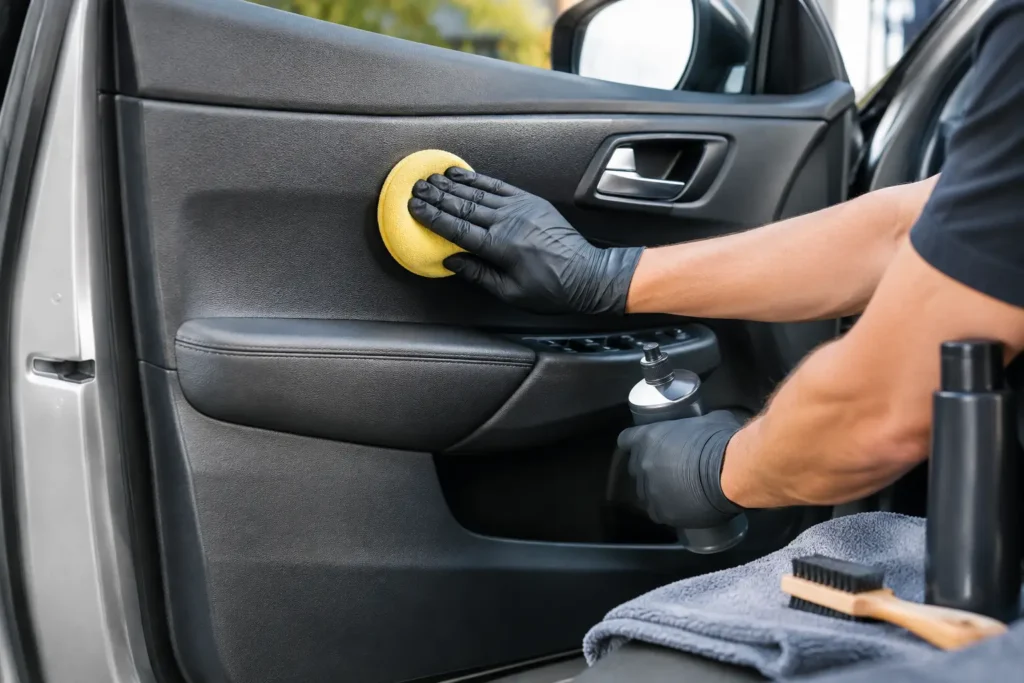
A cracked armrest, peeling vinyl insert, or faded door pull can make an otherwise clean vehicle feel neglected every time you get in. To restore car door panels correctly, you need to treat them as layered interior components, not as simple pieces of plastic or upholstery. The visible surface matters, but so do the backing board, mounting points, moisture barrier, trim fitment, and color match.
Door panels take more abuse than most interior parts. They are exposed to hands, shoes, sunlight, moisture, cleaning chemicals, and repeated contact at the armrest. A proper restoration can return the panel to a factory-new appearance or give it a more tailored custom finish, but the right method depends on what has actually failed.
Start by Diagnosing the Door Panel
The first question is not which product to buy. It is whether the damage is cosmetic, structural, or both. Surface dirt, light scuffs, and mild color transfer may respond to careful cleaning. Faded dye, worn armrest vinyl, cracked leather, broken clips, swollen backing boards, and separated inserts call for more involved repair.
Remove the panel only after documenting its condition and hardware. Take photos of screw locations, switch connectors, trim caps, cable routing, and any clips that may be hidden behind the armrest or pull handle. Modern luxury vehicles can have speaker grilles, ambient lighting, soft-close hardware, side-impact components, and delicate switch assemblies built into the panel. Classic cars may have fragile fiberboard backers, hard-to-replace chrome trim, or original materials worth preserving.
Look closely for these common failure points:
- Loose or curled upholstery around armrests and insert edges
- Cracked, warped, or water-damaged backing boards
- Broken plastic mounting tabs, retaining clips, and pull-handle supports
- Faded, sticky, peeling, or scratched painted surfaces
- Dried, split, or shrunken leather and vinyl
A panel with solid structure and tired upholstery is an excellent restoration candidate. A panel with a severely swollen board, missing plastic framework, or extensive water damage may need reconstruction before any cosmetic work begins.
Clean Before You Repair
Cleaning is not a shortcut around restoration. It is how you reveal the real condition of the material. Oils and silicone-based dressings can hide cracking, prevent dyes from bonding, and make repair coatings fail early.
Use a material-appropriate interior cleaner and soft brushes for textured vinyl, plastic, and seams. Leather should be cleaned with a dedicated leather cleaner rather than harsh degreasers. Avoid soaking the panel, especially near stitched sections, cardboard or fiberboard backers, and glued upholstery. Excess moisture can loosen adhesives and worsen warping.
Once the panel is clean and dry, reassess it under direct light. What looked like a stain may be missing color. What looked like ordinary wear may be a top layer that has become brittle and started to separate. This is where a professional eye saves time. Recoloring over failed material may look acceptable for a few weeks, then peel or crack with normal use.
Repair the Structure Before the Surface
A beautiful finish will not compensate for a loose armrest or a panel that rattles against the door. Structural repairs come first.
Broken plastic tabs and mounting points can often be rebuilt with plastic repair methods and reinforcement, provided the surrounding material is still sound. If the door pull has flexed enough to split its support, it needs reinforcement designed to handle the force of opening the door, not just filler applied to the visible crack.
Warped backing boards are more complicated. Some can be flattened and reinforced, while others are too compromised from moisture exposure to retain their shape. In that case, rebuilding the backing board may be the better long-term answer. A new upholstery surface installed over a warped board will eventually show the underlying distortion.
Before reinstallation, inspect the moisture barrier inside the door. A missing or damaged barrier allows water to migrate into the panel, leading to swollen boards, mildew odors, separated upholstery, and corrosion around electrical components. Replacing or resealing this barrier is one of the most overlooked steps in door panel restoration.
Choose the Right Finish for Each Material
Vinyl and Plastic Repairs
Textured vinyl and molded plastic are common on daily drivers, trucks, and many modern vehicles. Light scratches and faded color can often be repaired through careful prep, flexible repair materials where needed, and color-matched refinishing. The key is preserving the panel’s original texture. Heavy sanding or thick coatings can leave a smooth patch that looks worse than the original damage.
Peeling soft-touch coatings require a different approach. If the coating has failed, the unstable material must be removed and the substrate properly prepared before refinishing. Applying new color over sticky or peeling material only delays the problem.
Leather Door Panel Restoration
Leather door inserts and armrests need more than conditioner when they are cracked, stretched, or worn through. Minor finish wear can sometimes be refinished after proper cleaning and prep. Deep cracks, hard leather, loose stitching, or torn panels usually call for leather repair or reupholstery.
Reupholstery is often the better value when the leather has lost its strength. New leather can be selected to match the factory grain, sheen, perforation pattern, stitching color, and surrounding seats. This matters in premium interiors, where a mismatched panel can stand out immediately even if the workmanship is otherwise clean.
Suede, Alcantara, and Custom Materials
Suede-style and Alcantara-style inserts create a distinctive appearance, but they are less forgiving than vinyl. Adhesive choice, panel prep, edge wrapping, and direction of the material all affect the final result. Custom work can include leather, suede, contrast stitching, painted trim, carbon fiber accents, or coordinated color changes, but it should still respect the panel’s shape and function.
A custom door panel should look intentional from every seat in the vehicle. That means aligning its material and color choices with the steering wheel, console, dash trim, seats, and shift area rather than treating the door as an isolated project.
Color Matching Is Where Quality Shows
Interior colors are rarely as simple as black, beige, or gray. Factory shades can vary with age, sun exposure, trim level, and material type. A black leather armrest may have a different sheen than the black plastic lower panel beside it. A tan interior may include several related shades across leather, vinyl, painted trim, and carpet.
For that reason, color matching is not just selecting a code. It involves matching tone, gloss level, texture, and the way a finish reflects light. The goal is not to make one repaired spot look newly painted. The goal is to make the repaired section belong to the entire interior.
When sending parts out for restoration, include clear photos of the panel in natural light and photos of adjacent interior pieces. If a specific color match is critical, providing a removable reference piece can improve accuracy. Craft Customs handles interior restoration work in-house, where refinishing and material decisions can be controlled from prep through final inspection.
Know When DIY Makes Sense
DIY work can be worthwhile for basic cleaning, replacing clips, minor trim removal, and modest cosmetic improvement on a driver-quality vehicle. It can also make sense when the panel is readily available and you are comfortable accepting a learning curve.
Professional restoration is usually the smarter route when panels are rare, leather is torn, a factory color must be matched, woodgrain or painted trim is involved, or the vehicle has collector, luxury, or resale value. The trade-off is simple: a lower initial cost can become expensive if incorrect adhesive, paint, or disassembly damage creates a larger problem later.
Be especially cautious with universal repair kits. They can be useful for small defects, but they are not designed around every grain pattern, substrate, or factory finish. The most convincing repairs come from matching the material system to the specific panel, not from forcing a generic solution onto it.
Reinstall Without Creating New Damage
After the work is complete, allow finishes and adhesives to cure fully before handling the panel. Reinstall with new clips when possible, since old retainers can become brittle and cause gaps, rattles, or loose edges. Confirm that door handles, lock cables, window switches, speakers, lights, and seat-memory controls operate correctly before snapping every trim piece into place.
Do not force a panel that will not seat properly. A trapped wire, misrouted cable, or misaligned clip can crack a fresh repair or damage the door’s internal hardware. Take the extra time to check alignment along the window seal, armrest, lower edge, and trim transitions.
A restored door panel changes more than one piece of the cabin. It is the surface your hand reaches for first, the detail passengers notice at close range, and a daily reminder of whether the interior has been cared for. Done with the right materials and preparation, it can make the entire vehicle feel worth getting back into.