
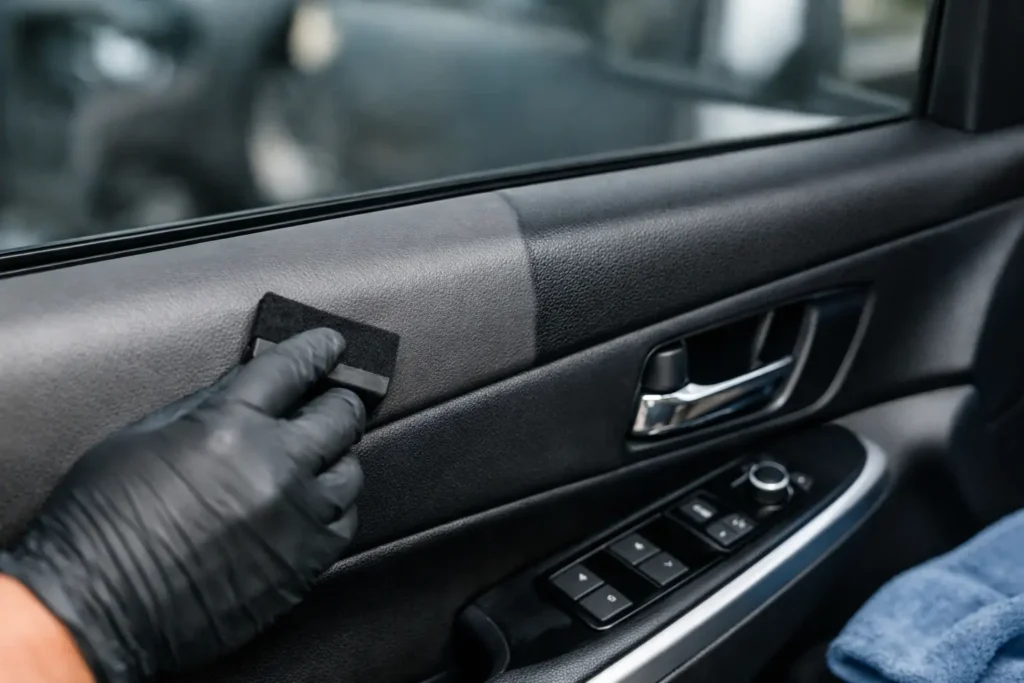
A faded dash bezel, chalky door panel, or sun-bleached console can make an otherwise clean vehicle feel neglected every time you get behind the wheel. Knowing how to restore faded interior trim starts with recognizing that not every dull surface needs the same fix. A quick dressing may improve the appearance for a few days, but proper restoration addresses the material, the damage, and the finish that originally belonged there.
For collectors, enthusiasts, and owners who expect more from their interiors, the goal is not simply to make trim darker. It is to return the piece to a clean, even, durable factory-style appearance – or refinish it to match a custom interior vision.
Why Interior Trim Fades in the First Place
Interior trim lives under constant attack from ultraviolet light, heat, body oils, cleaning chemicals, and repeated contact. Dark gray and black plastics often become pale or blotchy. Vinyl-coated panels can lose their color or develop a dry, hard texture. Painted bezels may show scratches, peeling clear coat, or worn-through edges around switches and cup holders.
The cause matters because fading is sometimes only on the surface, while other times the original coating has failed. If the trim looks evenly dull but still feels smooth and intact, a careful cleaning and refinishing process may be all it needs. If it is peeling, sticky, cracked, warped, or deeply scratched, the restoration must include repair work before color is applied.
Woodgrain, carbon fiber, and soft-touch finishes require even more caution. A wood trim panel with cloudy clear coat is not repaired the same way as faded black plastic. Likewise, a soft-touch dash component can be ruined by harsh solvent or an incompatible coating. The best result comes from treating the part as the specific material it is, not as generic interior plastic.
How to Restore Faded Interior Trim: Start With Identification
Before buying a restorer or reaching for a paint can, inspect the part closely in direct light. Look at hidden edges, the back of removable pieces, and areas protected from sunlight. Those spots often reveal the original color and sheen.
Most faded interior components fall into one of four categories: molded plastic, vinyl or flexible plastic, painted trim, and decorative material such as woodgrain or carbon fiber. A fifth category, soft-touch coated trim, deserves special handling because the rubberized surface may become sticky or peel as it ages.
Molded plastic typically has color all the way through the material and may respond well to cleaning, gentle abrasion, and a trim-specific dye or coating. Vinyl and flexible panels require products that flex with the material. Painted trim needs a more traditional refinishing approach with proper surface preparation, color, and sometimes clear coat. Decorative trim may need sanding, refinishing, re-clearing, or a complete conversion depending on the condition.
If you are unsure what you are working with, do not test aggressive cleaners in a visible area. A small mistake can turn a faded piece into a permanently damaged one.
Clean Away Contamination Before You Judge the Damage
Many interior pieces look faded because they are coated in silicone dressings, skin oils, smoke residue, or residue from previous cleaners. These contaminants also prevent new color coatings from bonding correctly.
Remove the part when possible. Restoration is cleaner and more accurate when bezels, console pieces, handles, and trim panels are refinished outside the vehicle. It also prevents overspray, uneven edges, and missed areas around clips or openings.
Clean the component with a material-safe interior cleaner and a soft brush or microfiber towel. Work into grain patterns, seams, recessed lettering, and switch openings. Follow with a compatible surface-prep cleaner to remove remaining oils and dressing residue. The part should look uniformly clean and feel dry, not slick.
Avoid soaking electronics, switch assemblies, glued-on emblems, or wood veneer edges. If a part cannot be safely disassembled, mask the surrounding components carefully and use minimal moisture.
Repair Scratches, Peeling, and Texture Damage First
Color will not hide failed material. It often makes defects more visible.
For light scuffs on rigid plastic or painted trim, careful sanding can level the damaged area before refinishing. Use fine abrasives and light pressure. The objective is to smooth the scratch without flattening the original grain or changing the contours of the part.
Deep gouges, cracks, and missing material require a flexible repair compound or plastic repair process suited to the substrate. Once repaired, the area may need texture reproduction so it does not stand out against the surrounding panel. This is one reason highly visible dash trim, console lids, and door panels often benefit from professional work. Matching molded grain by hand is difficult, especially on luxury and classic interiors where the original texture is part of the vehicle’s character.
Peeling soft-touch finishes need to be fully addressed, not covered with a shiny dressing. Loose coating must be removed and the surface stabilized before a new finish can be applied. Skipping this step leaves weak material underneath the new coating, and the failure will return.
Choose a Finish That Matches the Original Appearance
The right color is only half the job. Sheen is what makes a restoration look factory correct instead of freshly painted.
Most dashboards and interior plastics are not high gloss. They may be matte, low satin, or a subtle semi-gloss. A finish that is too glossy can reflect on the windshield, exaggerate imperfections, and immediately look aftermarket. Conversely, a finish that is too flat can make a formerly rich black panel look dry and unfinished.
For plastic and vinyl components, use a quality interior dye or coating designed to bond and flex. These products are different from ordinary spray paint. They are formulated for interior substrates and, when applied over proper preparation, produce a more natural appearance and better wear resistance.
Painted trim can be refinished in factory colors, paint-matched to other interior components, or upgraded with a custom finish. Black piano trim, metallic accents, color-matched bezels, suede-wrapped panels, and carbon fiber conversions can dramatically change the cabin, but they should fit the vehicle’s overall design. A custom piece looks best when its color, texture, and gloss level are repeated intentionally elsewhere in the interior.
Apply Color in Thin, Controlled Coats
Once the surface is clean, repaired, and fully dry, apply the coating in light, even passes. Heavy coats are one of the most common causes of runs, loss of texture, tackiness, and weak adhesion. Build coverage gradually, allowing the specified flash time between coats.
Keep the spray angle consistent and avoid stopping over the center of the panel. Start each pass slightly off the part, move across at a steady speed, and release after clearing the opposite edge. On intricate pieces, work recessed areas first, then apply a final even coat across the visible face.
Do not rush curing. A part may feel dry to the touch long before the coating has reached its usable hardness. Reinstalling it too soon can leave fingerprints, clip marks, or scratches around mounting holes. Cure time varies by product, temperature, humidity, and coating thickness, so follow the product instructions rather than relying on appearance alone.
Know When a Professional Restoration Is the Better Investment
DIY refinishing can work well for simple, removable plastic trim that has mild fading and no structural damage. It becomes less predictable when the part is rare, expensive, heavily textured, color-sensitive, or tied to a high-value interior.
Professional restoration is particularly worthwhile for classic steering wheel spokes, woodgrain dash pieces, luxury console trim, painted interior accents, leather-wrapped components, and panels with cracks or failing soft-touch coatings. The process may involve material repair, texture work, custom color mixing, controlled spraying, and finish matching that are difficult to reproduce in a home garage.
For owners who want factory-new results or a coordinated custom interior, Craft Customs restores and refinishes original interior components in-house, including dash trim, consoles, steering wheels, and related pieces. Sending in the original part preserves fitment while allowing the finish to be repaired, recolored, or upgraded with the level of preparation the component actually needs.
Keep Restored Trim From Fading Again
After restoration, maintenance should protect the finish rather than constantly alter it. Use a gentle interior cleaner, soft microfiber towels, and products that do not leave greasy silicone buildup. Avoid harsh degreasers, strong solvents, and stiff brushes on coated or dyed surfaces.
A windshield sunshade makes a meaningful difference for vehicles parked outdoors, especially in Texas, Arizona, Florida, and other high-heat climates. It reduces direct UV exposure and lowers the cabin temperatures that accelerate fading, warping, and coating failure.
The best restored trim does not call attention to the repair. It simply makes the cabin feel complete again – clean at a glance, correct to the touch, and worthy of the vehicle around it.