
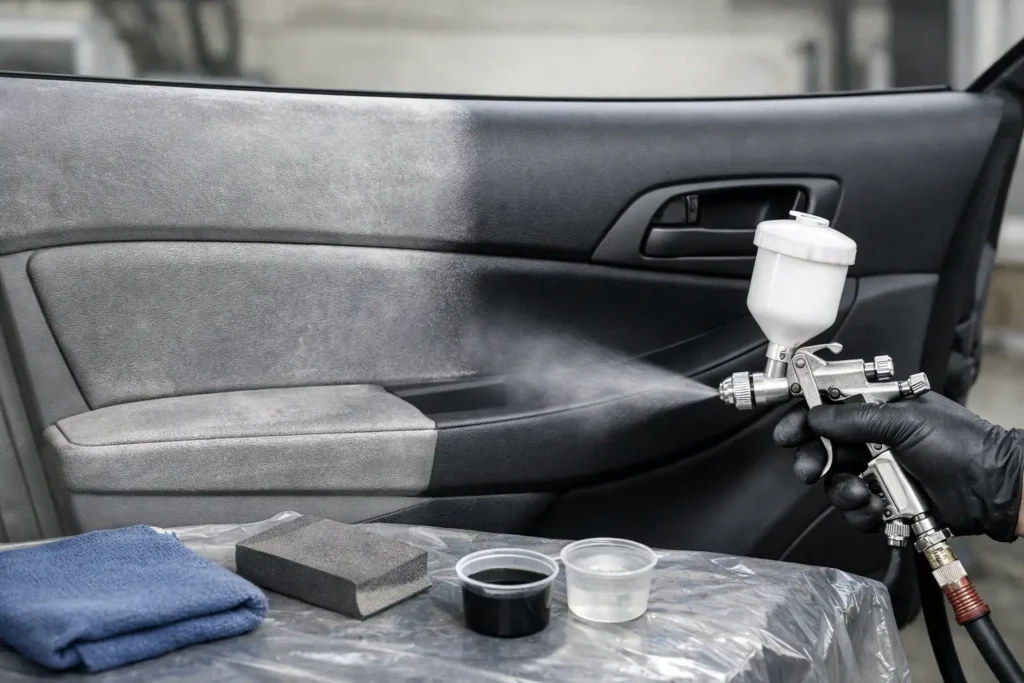
A faded door panel, scratched console, or peeling dash trim can make an otherwise well-kept vehicle feel neglected every time you get behind the wheel. Knowing how to refinish plastic interior panels is not about spraying on a quick coat of paint. The difference between a finish that looks factory-new and one that chips, shines unevenly, or turns sticky comes down to correct cleaning, repair, material selection, and curing.
Plastic interior trim varies widely from vehicle to vehicle. A textured ABS door panel, a soft-touch console bezel, a vinyl-coated dash piece, and a woodgrain-trimmed luxury panel may all require a different approach. The goal is always the same: restore a uniform color and sheen while preserving the original texture and ensuring the new finish stays put.
Start by Identifying What You Are Refinishing
Before sanding or applying any coating, determine whether the panel is bare plastic, vinyl-coated plastic, soft-touch material, painted trim, or a decorative component with woodgrain, metallic, or carbon fiber finish. This matters because the wrong cleaner, adhesion promoter, or coating can create a failure that is more difficult to correct than the original damage.
Most interior panels are made from ABS, polypropylene, PVC, or related molded plastics. Some are rigid and easy to repair. Others flex constantly when doors close, armrests are used, or console components are removed and reinstalled. A rigid coating on a flexible part is likely to crack. Likewise, an overly glossy finish on a factory-low-gloss dashboard trim will immediately look out of place.
Examine the damage in good lighting. Light scuffs, fading, and discoloration can often be corrected through deep cleaning and dye or coating. Gouges, cracks, melted areas, missing texture, and peeling soft-touch finishes require more extensive preparation. If the part has an original grain pattern, preserving or recreating that grain is a major part of a professional-quality result.
Remove the Panel Whenever Possible
Refinishing a panel in the vehicle may seem convenient, but it introduces unnecessary risk. Overspray can land on glass, leather, carpet, switches, electronics, and adjacent trim. More importantly, you cannot properly clean edges, mounting points, recesses, or the backside of a part while it is installed.
Remove the component carefully, using the correct trim tools and keeping track of screws, clips, and electrical connectors. Take photos before disassembly, especially on older or rare vehicles where hardware placement is not obvious. A broken retaining tab can turn a straightforward cosmetic restoration into a sourcing problem.
Once removed, inspect the panel’s mounting tabs and hidden edges. Repairing these areas before refinishing is worthwhile, particularly on a console, door panel, or dash trim piece that must flex during installation.
Cleaning Is the Step That Determines Durability
Interior plastics hold years of silicone dressings, skin oils, cleaners, smoke residue, waxes, and airborne contaminants. These contaminants are often invisible, but they can prevent coatings from bonding correctly. A panel that looks clean may still be contaminated enough to cause fisheyes, peeling, or uneven color.
Wash the part first with a mild cleaner and water, then use a purpose-made wax and grease remover or plastic-safe surface cleaner. Work with clean, lint-free towels and change towels often. Wiping contamination around the panel does not remove it.
Avoid soaking switch openings, foam-backed sections, and electronics. Also be cautious with aggressive solvents. They can soften certain plastics, erase factory markings, or damage a thin decorative coating. The correct cleaner depends on the material, which is one reason high-end trim deserves a more measured process than a generic aerosol can treatment.
Repair Scratches, Gouges, and Cracks Before Coloring
A coating can hide mild discoloration, but it will not make deep damage disappear. Scuffs that catch a fingernail, cracks around mounting points, and melted areas need to be repaired and leveled before any color is applied.
Light scratches can usually be feathered with fine abrasive pads or fine-grit sandpaper. Use a light touch. The goal is to level the damaged area without flattening the surrounding texture. On smooth trim, sanding can create an invisible transition after refinishing. On grain-textured parts, sanding too aggressively leaves a smooth patch that stands out even after color is restored.
For deeper damage, use a flexible repair compound designed for interior plastic or vinyl. Rigid body filler is rarely the right choice for a part that bends or receives regular contact. Build repairs in thin layers, allow them to cure, then shape them gradually. If texture has been lost, it may need to be recreated with a grain pad, texture coating, or a custom repair technique before the final color coat.
Cracks require more than filler on the visible surface. The strongest repair reinforces the backside of the panel first, then repairs and refines the face side. This is especially important on console lids, door pull areas, and trim sections that are constantly under stress.
How to Refinish Plastic Interior Panels With the Right Coating
The best coating system is one designed specifically for automotive interior plastic and vinyl. These products are typically dyes or flexible coatings that chemically and mechanically bond to a properly prepared surface. Ordinary household paint is a poor substitute. It may look acceptable at first, then scratch, flake, feel rough, or become glossy under cabin heat.
After cleaning and repairs, lightly scuff the surface as needed and remove all dust. Some plastics require an adhesion promoter before color is applied. This step is particularly valuable on hard-to-coat plastics and heavily handled components. Follow the product system’s application window carefully. If the promoter dries beyond its recommended period, adhesion can suffer.
Apply several light, even coats rather than one heavy coat. Heavy application fills texture, runs in corners, and often creates a plastic-looking surface. Light coats preserve grain and allow color to build naturally. Allow proper flash time between coats, paying close attention to edges, recesses, and high-contact zones.
Color match matters just as much as durability. Black interior trim alone can range from charcoal to blue-black, warm black, or low-gloss satin. Tan, gray, red, and beige interiors are even less forgiving. A close color with the wrong sheen can look mismatched beside an original dash or steering wheel. For restoration work, matching both color and gloss level is the standard.
Choose the Finish for the Part’s Job
Not every panel should receive the same topcoat or sheen. Dash components generally need a low-gloss finish to reduce windshield glare. Door panels, consoles, and lower trim often carry a subtle satin sheen. Decorative trim may be gloss, matte, metallic, woodgrain, or carbon fiber, depending on the vehicle and the desired custom look.
High-touch components need extra consideration. An armrest, console lid, door pull, or shifter surround sees more abrasion than a rear quarter panel trim piece. A quality flexible coating system and full cure time are essential in these areas. Even a properly applied finish can be damaged if it is handled, assembled, or cleaned too soon.
If the part is a premium decorative panel, refinishing may mean more than restoring its original color. Woodgrain can be refinished for a richer, clearer appearance. Plain trim can be color-matched to the cabin, converted to carbon fiber, or wrapped in suede for a more tailored interior. The best choice depends on whether you are protecting originality, completing a custom build, or bringing an outdated cabin into a newer design direction.
Let the Finish Cure Before Reassembly
Dry to the touch is not the same as fully cured. A panel can feel ready within hours while the coating is still vulnerable to fingerprints, clip pressure, cleaners, heat, and abrasion. Follow the coating manufacturer’s cure recommendations, and give high-contact pieces additional time whenever possible.
Reinstall the part carefully using clean hands and proper trim tools. Avoid dragging tools across finished surfaces or forcing clips that are misaligned. Once installed, clean the panel with a mild interior cleaner only. Avoid silicone-heavy dressings and harsh solvents, both of which can alter the sheen or compromise the surface over time.
When Professional Refinishing Makes More Sense
DIY refinishing can work well for straightforward faded trim with minor wear. It becomes far less predictable when a part is rare, heavily textured, cracked, soft-touch coated, color-sensitive, or part of a high-value classic, luxury, or exotic vehicle. Those components are difficult to replace, and a failed coating job often requires stripping and repeating the process.
Professional refinishing is especially worthwhile when the panel must match surrounding leather, woodgrain, carbon fiber, dash trim, or factory interior colors. At Craft Customs, interior components are refinished in-house with the same attention given to steering wheels, consoles, armrests, and custom trim work. The objective is not simply to cover wear. It is to return the part with a finish that belongs in the vehicle.
A properly refinished panel should not call attention to itself. It should make the rest of the interior feel cleaner, newer, and more complete – the kind of detail you notice every time you open the door, without having to explain why.