
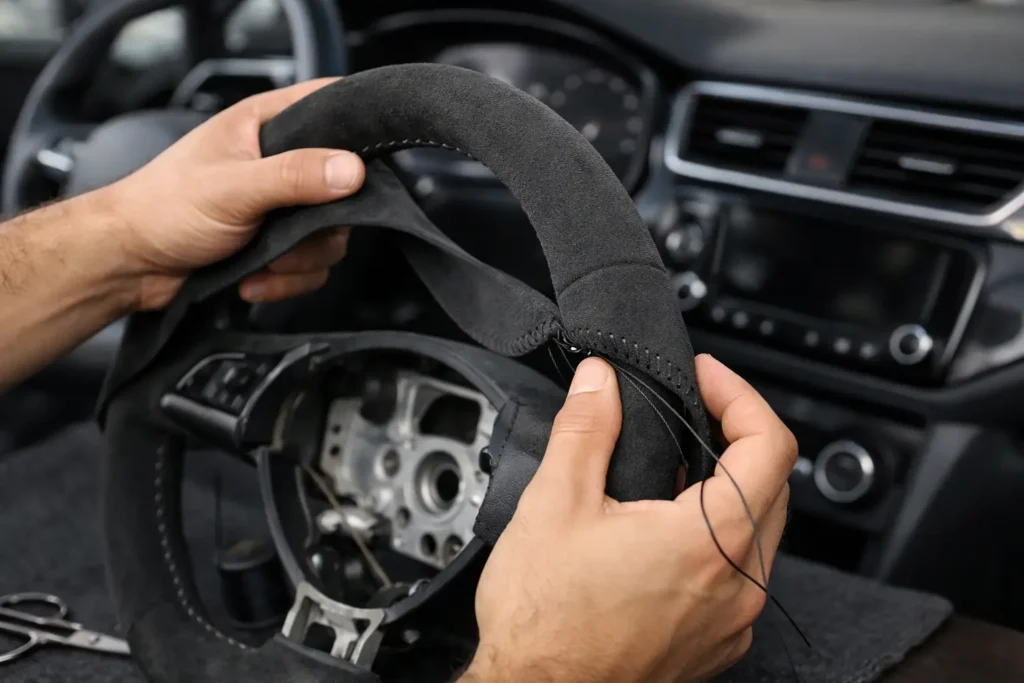
A steering wheel is one of the few parts of a vehicle you see and touch every time you drive. When the factory leather is shiny, split, or worn smooth, a suede finish can make the entire cabin feel more purposeful and premium. Learning how to wrap a suede steering wheel starts with understanding that a good result is not just about the material. It comes down to wheel preparation, accurate patterning, proper stitch tension, and selecting a suede that suits the way the vehicle is used.
Suede-wrapped wheels are especially popular in performance cars, luxury interiors, restomods, and custom builds because they offer a soft, secure grip with a motorsport-inspired appearance. But suede is less forgiving than conventional leather. A rushed job can leave bulky seams, loose material, uneven perforations, or a wheel that looks tired again after a season of daily use.
Decide Whether Suede Is Right for Your Steering Wheel
Before removing the wheel or ordering material, consider how the vehicle is driven. Genuine suede has a rich hand feel and authentic texture, but it can darken and become matted from skin oils. It is usually best for weekend vehicles, show cars, and owners willing to maintain it regularly.
Automotive microfiber suede, often called synthetic suede, is a more practical choice for many daily drivers. Quality versions provide a similar visual effect, resist fading well, and clean more predictably. The difference is not simply genuine versus synthetic. Material thickness, stretch, backing, color consistency, and abrasion resistance all affect the final result.
Also consider the wheel design. A simple three-spoke wheel is generally straightforward to rewrap. Wheels with complex thumb grips, molded contours, flat bottoms, paddle cutouts, exposed carbon fiber sections, or integrated controls require more exact pattern work. If the wheel includes an airbag module, wiring, or switch assemblies, removal and reinstallation should be handled carefully and according to the vehicle manufacturer’s procedures.
Remove and Inspect the Wheel Before Wrapping
The best steering wheel wraps begin off the vehicle. Disconnect the battery and allow the vehicle’s airbag system to discharge according to manufacturer guidance before working around the airbag. Mark the wheel’s centered position relative to the steering shaft before removal. That simple step prevents reinstalling the wheel one spline off-center.
Once the wheel is removed, inspect the existing cover and foam structure. If the original leather is only lightly worn, a new cover can sometimes be installed over it. This saves time, but it also increases the grip diameter. On a thick factory wheel, that extra material can make the rim feel overly bulky and may cause the new cover to sit poorly around spokes and switch bezels.
For the cleanest restoration, remove the old leather cover and any failing adhesive. The underlying foam should be smooth, intact, and firmly bonded to the wheel frame. Repair low spots, torn foam, or deteriorated sections before applying suede. Suede will follow every imperfection beneath it, especially along high-visibility areas at the top of the rim and near the spokes.
Clean the wheel thoroughly with a residue-free surface cleaner. Grease, old adhesive, silicone dressing, and loose foam dust can interfere with bonding and make later work more difficult.
Tools and Materials That Make the Difference
A hand-wrapped steering wheel does not require a full upholstery shop, but the right supplies prevent avoidable problems. You will need automotive-grade suede or microfiber suede, thin pattern material, sharp scissors, a utility knife, contact adhesive suited for automotive trim, masking tape, clips, a curved upholstery needle, strong waxed thread, and a trim tool for tucking edges.
Use thread designed for upholstery rather than ordinary household thread. It must tolerate constant movement, heat, and tension without fraying. Many factory-style wraps use a baseball stitch because it creates a clean, tight seam along the inside circumference of the wheel.
Avoid relying on adhesive alone to hold the cover together. Adhesive secures the suede to the rim and helps control the material during assembly, but the stitching is what closes the seam and gives the wrap its tailored finish. Too much adhesive can also soak through thin material or create hard, unnatural areas under the driver’s hands.
How to Wrap a Suede Steering Wheel With a Clean Pattern
Patterning is where many DIY wraps go wrong. Do not estimate the material size by measuring only the circumference of the wheel. The rim changes shape around thumb rests, spoke transitions, and molded finger grooves. A flat piece of suede must be cut to accommodate those contours without wrinkling or pulling.
Use masking tape or flexible pattern material to map each section of the rim. If the wheel has spokes that divide the rim into separate sections, make an individual pattern for each one. Mark the top center, bottom center, spoke locations, and seam line orientation. These reference points keep the grain and texture direction consistent across the finished wheel.
Transfer the pattern to the backside of the suede, adding a modest seam allowance on both edges. Cut conservatively. You can trim material, but a panel that is too narrow will not stretch into place without excessive tension. With genuine suede in particular, note the direction of the nap. Panels should be oriented consistently so the color and sheen do not shift from one section to another.
Dry-fit every panel before applying adhesive. The material should lay smoothly around the rim with enough edge overlap to stitch, yet it should not bunch near the spokes. Small relief cuts may be needed at tight transitions, but they should be hidden under trim or within the seam allowance whenever possible.
Apply Adhesive in Controlled Sections
Apply a light, even coat of contact adhesive to the wheel rim and the corresponding backside of the suede. Follow the adhesive manufacturer’s flash time. Joining the surfaces too early can cause slipping; waiting too long can reduce bond strength.
Start at a hidden or low-visibility point, commonly near the bottom spoke, and work in short sections. Press the suede down from the center of the rim outward, smoothing it as you go. Keep the material under light, even tension. Pulling too hard can distort the texture and leave the finished cover looking stretched rather than fitted.
Around thumb grips and spoke bases, use a trim tool to press the material into contours. This is where patience matters. A wheel can look excellent from a distance but reveal lifted edges and bunching every time the driver turns it if these areas are not seated properly.
Stitch the Seam Without Over-Tightening It
Once the material is bonded and positioned, bring the two seam edges together with clips. Pre-punched stitch holes produce the most consistent result, particularly for first-time installers. Space them evenly and keep them the same distance from each edge.
For a baseball stitch, pass the needle from one side to the other in alternating loops, pulling each section snug as you advance. The goal is a closed, straight seam with matching tension from start to finish. Do not pull so aggressively that the edges curl inward or the thread cuts into the suede backing.
Check alignment every few inches. If the seam drifts off-center, correct it immediately instead of hoping it will disappear around the next section. At spoke junctions, tuck and secure edges cleanly before continuing. These transitions are the clearest sign of whether a steering wheel was restored with precision or simply covered.
Finish the thread securely on the inside of the seam, where it cannot be seen or felt. Trim excess material only after the cover is fully installed and the seam tension has been checked around the complete wheel.
Reinstall Carefully and Maintain the Finish
Reinstall the wheel in its original centered position, reconnect all controls, and verify that the airbag module, horn, and steering-wheel switches are properly seated. Confirm that the wheel turns freely and that no material interferes with paddle shifters, trim pieces, or switch operation.
To keep suede looking sharp, drive with clean hands and avoid leather conditioners, silicone dressings, or oily interior cleaners. These products can darken the fibers and leave the surface slick. A soft suede brush can lift the nap between cleanings. For microfiber suede, use a cleaner approved for synthetic automotive upholstery and blot rather than scrub.
If the wheel has deep contours, damaged foam, complex switch openings, or an expensive original airbag assembly, professional reupholstery is often the better value. Craft Customs restores and customizes steering wheels with materials, stitching, and fitment chosen for the specific wheel rather than a generic cover.
A properly wrapped suede steering wheel should feel intentional from the first grip: smooth at the seams, secure in the hands, and proportioned like it belonged in the vehicle from the factory.