
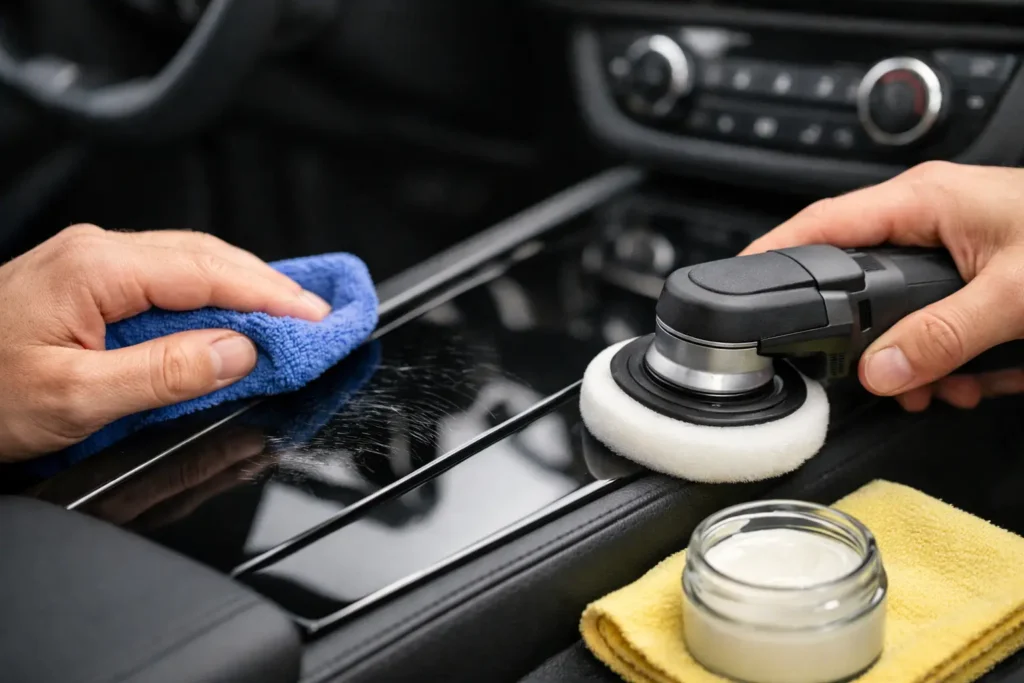
A clean piano black console or dash panel can make an interior feel expensive. A few visible scratches can do the opposite, especially in direct sunlight. The challenge when you repair scratched piano black trim is that this high-gloss finish shows every flaw: wipe marks, fingernail scratches, haze, compound residue, and uneven shine.
Piano black trim is often mistaken for a simple painted plastic part. In reality, the glossy surface may be clear-coated plastic, painted ABS, acrylic, or a finished component with delicate coatings and tight edges around switches, cupholders, shifters, and infotainment controls. The right repair depends on how deep the damage is, how much of the panel is affected, and whether preserving an original finish matters more than achieving a flawless result.
Why Piano Black Trim Scratches So Easily
Piano black trim is visually striking because it reflects light like glass. That same reflectivity makes minor defects impossible to ignore. Dust dragged across the surface during cleaning can leave fine circular marks. Keys, rings, seatbelt buckles, phone mounts, and hard plastic accessories can create deeper isolated scratches.
Many factory piano black pieces also have relatively soft clear coats. Even a microfiber towel can mark the surface if dirt is trapped in the fibers. This is why aggressive rubbing, household cleaners, and dry dusting often make the problem worse rather than better.
The key question is whether the scratch is in the top clear layer or has cut through the finish. Fine swirls and light scratches can usually be corrected by careful polishing. A scratch that catches a fingernail, shows gray or white plastic beneath the finish, or runs through a sharp edge may require refinishing instead.
Inspect the Damage Before You Try to Repair Scratched Piano Black Trim
Start under bright, direct light. A phone flashlight held at a low angle will reveal whether you are looking at light surface marring, a deeper clear-coat scratch, or missing material. Clean the panel first with a gentle automotive interior cleaner and a fresh, high-quality microfiber towel. Do not scrub. Lift dirt away with light passes, then dry the piece carefully.
Light scratches usually appear as faint lines that change or disappear depending on the angle. These are candidates for a controlled polish. Deeper scratches stay visible from every angle and may look white because the damaged groove scatters light.
If the part is removable, removing it is often the best decision. Working around buttons, stitching, chrome accents, and electronics increases the chance of staining adjacent materials or creating inconsistent gloss near edges. For a luxury, collector, or custom vehicle, a removed trim piece also allows for a more accurate finish match.
What Not to Use
Avoid shortcuts that trade temporary shine for permanent damage. Toothpaste, baking soda, rubbing alcohol, kitchen cleaners, and coarse scratch-removal pads are not appropriate for piano black trim. They can dull the surface, create a cloudy patch, or cut through thin clear coat.
Be cautious with generic interior dressings as well. Some will hide fine scratches briefly by filling them with oils, but the marks return after cleaning. Others leave an overly slick, uneven finish that does not match the surrounding trim.
When a Careful Polish Can Work
For very light swirls and shallow scratches, a fine finishing polish can improve the appearance substantially. The goal is not to scrub the scratch away. It is to level a microscopic amount of surrounding clear coat so light reflects evenly again.
Use the least aggressive product and method possible. Apply a small amount of fine plastic or finishing polish to a clean foam applicator or a small, soft polishing pad. Work one small test area with light pressure. Wipe residue with a clean microfiber towel, inspect under direct light, and stop as soon as the correction is acceptable.
Hand polishing is slower, but it is generally safer for small interior panels. Machine polishing can work in experienced hands, particularly on larger removable console panels, but it creates more risk around thin edges and tight contours. Excess heat can distort plastic, soften coatings, or cause the finish to fail.
A successful light correction should leave the trim glossy and uniform, not merely darker from leftover polish. If the surface begins to look hazy, the polish is too aggressive, the pad is contaminated, or the panel needs a more complete refinishing process.
Why Deep Scratches Need More Than Polish
Polishing removes material. That is the limitation many do-it-yourself repairs overlook. If a scratch is deeper than the available clear coat, continued polishing will only widen the damaged area, reduce gloss, and eventually expose the base color or plastic beneath.
Touch-up products can sometimes reduce the appearance of a deep isolated scratch, but they rarely disappear on a high-gloss black panel. Brush-applied paint tends to leave a raised line. Fillers can look acceptable from a distance but remain obvious under sunlight. On a prominent center console, dash insert, or door trim panel, a spot repair may stand out more than the original scratch.
A professional restoration is the stronger option when there are numerous deep scratches, chipped corners, peeling clear coat, cracks, failed coatings, or previous repair attempts. Proper refinishing involves correcting the surface, preparing the substrate, applying compatible coatings, and restoring a consistent high-gloss appearance across the entire visible section. The difference is not just black paint. It is depth, clarity, edge coverage, and a finish that looks correct beside factory materials.
Refinishing Versus Replacing the Trim
Replacement is sometimes the simplest answer, especially if a new OEM panel is still available at a reasonable cost. But many luxury, classic, and discontinued vehicle parts are expensive, backordered, or no longer produced. Used replacements often arrive with the same scratches, broken tabs, fading, or mismatched wear.
Refinishing keeps the original fitment, mounting points, switch openings, and grain transitions intact. It also creates an opportunity to change the look of the interior. A damaged piano black piece can be restored in factory-style gloss black, color-matched to another interior element, converted to a carbon fiber look, or refinished in a more forgiving satin or matte treatment.
The right choice depends on the vehicle and your goals. Factory-correct restoration is usually best for a collector vehicle or an interior where originality supports value. A custom finish can make more sense for a performance build, an upgraded daily driver, or a cabin that already includes carbon fiber, suede, painted accents, or custom leather.
Protecting the Finish After Repair
Once the trim is corrected or refinished, maintenance determines how long it stays clean. Piano black should never be dry-wiped. Blow loose dust away if possible, then use a clean, plush microfiber towel with a gentle automotive-safe cleaner. Keep separate towels for glossy trim so they do not pick up grit from leather, carpets, or exterior paint.
Avoid storing keys, coins, and other hard objects on a piano black console. If the vehicle has a high-contact area around the shifter or cupholders, a professionally installed protective film can be worthwhile. Film adds a sacrificial layer, although it must be installed cleanly and precisely to avoid visible edges, trapped debris, or bubbles.
For frequently used vehicles, a light cleaning routine is better than waiting until fingerprints and dust require heavy rubbing. The less friction you put on piano black trim, the longer it will keep its clarity.
When Expert Interior Refinishing Is Worth It
If the trim is part of a high-value interior, has damage across multiple panels, or needs to match a specific factory finish, professional work protects the result. Interior trim is not a place for a one-size-fits-all repair. Different plastics, coatings, colors, and sheen levels require different preparation and finishing techniques.
Craft Customs restores and customizes original interior components in-house, including consoles, dash trim, steering wheel accents, and other high-contact pieces. Sending in the original part allows the finish to be corrected with the care needed to preserve fitment and deliver a consistent, factory-new appearance.
A scratch-free piano black panel will always require thoughtful care, but it does not have to remain a reminder of every mile and every misplaced key. Start with an honest assessment of the damage, correct only what the material can safely support, and choose refinishing when the finish deserves more than a temporary fix.