
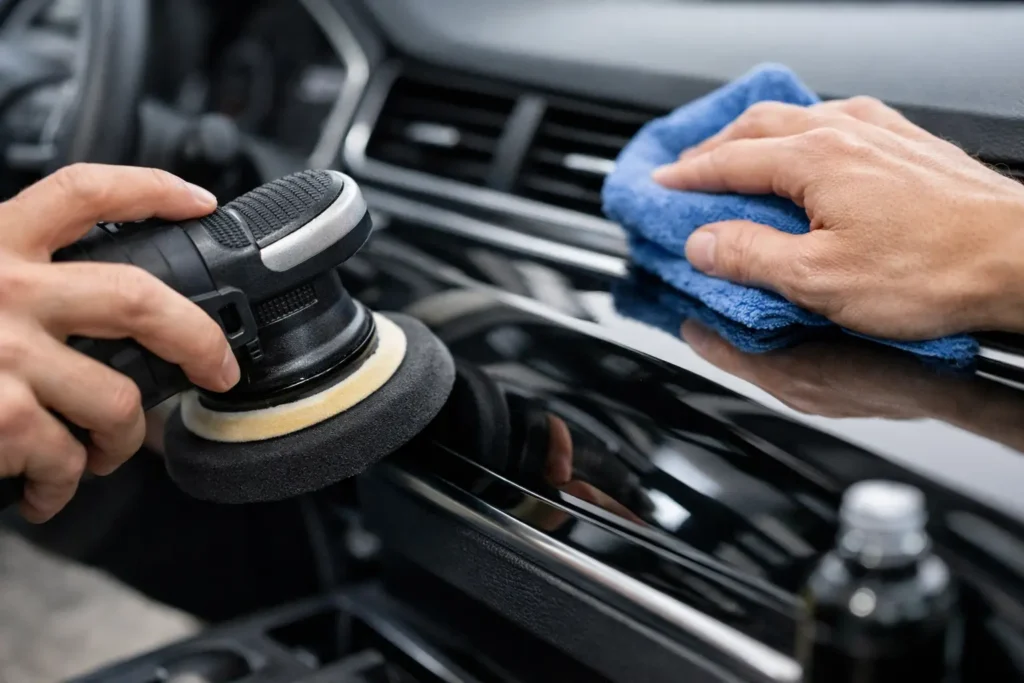
A scratched piano black console can make an otherwise clean interior look tired every time sunlight hits it. The finish is dramatic when it is right, but it shows fingerprints, swirl marks, deep scratches, worn edges, and failed clear coat more than almost any other interior surface. To refinish glossy piano black trim correctly, the goal is not simply to make it black again. The goal is a level, high-gloss surface that matches the surrounding interior without looking painted, hazy, or overly thick.
That takes careful diagnosis before any sanding or coating begins. Piano black trim may look like a simple black plastic panel, but the repair approach changes depending on the damage, the substrate, and whether the original finish is painted, molded, coated, or hydro-dipped.
What Makes Piano Black Trim Difficult to Refinish?
Piano black is unforgiving because it reflects light like a mirror. A small sanding scratch that would disappear on textured plastic can remain visible after clear coat. A slight low spot can distort reflections. Dust nibs, dry spray, improper curing, and aggressive polishing are all easier to see on black than on lighter colors or satin finishes.
Many modern trim pieces also have thin factory coatings over ABS plastic or similar materials. Sanding through that coating too quickly can expose a different-colored substrate or create a visible texture change. On older, high-end, and specialty vehicles, the part may include multiple materials, chrome accents, woodgrain sections, switches, or bonded soft-touch surfaces. Those details need to be protected and handled as part of the restoration, not treated as an afterthought.
There is also a practical difference between light surface marring and finish failure. Fine wash swirls and shallow marks may be corrected with a controlled polishing process. Deep scratches that catch a fingernail, peeling clear coat, cracked finish, discoloration, or prior repair work usually require a complete refinish.
Start by Identifying the Type and Depth of Damage
Before choosing a repair method, clean the trim with an interior-safe cleaner that leaves no dressing or silicone behind. Residue can hide scratches temporarily and can interfere with paint adhesion later. Inspect the panel under direct lighting from several angles rather than judging it in a dark garage.
Light scratches that disappear when the surface is wet are often candidates for polishing. If the scratch remains sharply defined, turns white, exposes plastic, or runs along an edge, polishing alone will not make it disappear. In fact, repeated polishing can thin the clear coat and leave the surrounding area less even than before.
Look closely for these signs of a full refinish:
- Clear coat peeling, cracking, or lifting at edges
- Deep scratches, gouges, or chips through the finish
- Yellowing, cloudy patches, or chemical staining
- Previous touch-up work with uneven gloss or texture
- Warped, softened, or damaged plastic beneath the coating
A panel with only moderate surface haze may not need paint. A panel with failed clear coat should not be treated like a simple polish job. Choosing the wrong level of repair is one of the fastest ways to spend time and money without getting a lasting result.
The Correct Process to Refinish Glossy Piano Black Trim
A professional-quality result comes from preparation and controlled finishing, not from applying a heavy coat of black paint. The exact materials vary by part and vehicle, but the sequence matters.
Remove the Part Whenever Possible
Refinishing trim in the vehicle creates unnecessary risk. Overspray can reach dash materials, leather, electronics, screens, and switch openings. It is also difficult to properly sand, clean, coat, and cure edges while a piece remains installed.
Removing the trim allows the entire surface to be repaired consistently, including corners and borders that receive the most wear. For pieces with buttons, vents, metal accents, or electronics, disassembly should be handled carefully. Broken clips, stretched vinyl, and damaged switch tabs can turn a cosmetic repair into a costly replacement problem.
Strip, Sand, and Level the Surface
The damaged finish must be leveled without changing the part’s shape. This begins with cleaning and degreasing, followed by controlled sanding to remove failed clear coat, reduce scratches, and feather chipped areas. Deep gouges may need a compatible repair material before the surface can be made flat.
The sanding stage is where most do-it-yourself repairs go wrong. Coarse paper can remove damage quickly but leave scratches that telegraph through the new finish. Sanding too aggressively along a raised edge can burn through the coating or round off a crisp factory contour. Working through appropriate grits and checking the panel under strong light helps keep the surface even.
If the trim is textured beneath the finish, that texture may need to be recreated or fully leveled depending on the original appearance. A piano black finish should look smooth and intentional, not like glossy paint applied over damaged plastic.
Apply Compatible Color and Clear Coat
For true piano black, color depth matters. The black should be rich and uniform, while the clear coat provides the gloss, protection, and optical clarity. Using a generic spray can may be tempting for a small trim piece, but it can produce inconsistent fan patterns, dry areas, solvent reactions, weak edge coverage, or a gloss level that does not match the rest of the cabin.
Proper adhesion products, color coating, and automotive-grade clear coat are selected based on the material and desired durability. Coats must be applied evenly and allowed to flash and cure correctly. Too much material too soon can cause runs, solvent pop, or soft clear. Too little can leave poor coverage and limited room for final leveling.
A custom interior shop may also adjust the finish to match an OEM gloss level. Not every black trim panel has the same reflectivity. Some factory pieces sit between satin and full piano gloss, and matching that distinction is what keeps a repaired panel from looking out of place.
Cure, Wet Sand, and Polish for Clarity
Fresh clear coat needs appropriate curing time before final correction. Once cured, small imperfections can be carefully leveled with ultra-fine sanding and then polished in stages. This is what creates the clean, liquid appearance people expect from piano black.
The final polish should remove sanding marks without leaving holograms or heat damage. Black surfaces reveal poor machine technique immediately, especially under sun or LED lighting. At this stage, a quality restoration should show consistent reflections from center to edge, with no dull patches around repairs.
When Polishing Is Enough and When It Is Not
Polishing is the right solution when the factory coating is intact and the defects are limited to light swirls, fine scratches, and surface haze. It preserves more of the original finish and can make a panel look dramatically better without repainting it.
Refinishing is the better investment when scratches are deep, the clear is peeling, the trim is stained or chipped, or someone has already attempted a poor repair. It is also the practical choice when several matching pieces are worn. Restoring a console lid but leaving scratched door trim, dash bezels, and shifter surrounds can make the unrepaired pieces stand out even more.
For rare, luxury, classic, or discontinued parts, refinishing the original component is often preferable to searching for a used replacement. Used trim commonly arrives with its own scratches, broken tabs, faded finish, or a different production shade.
Common DIY Mistakes That Ruin the Finish
The most common mistake is trying to cover scratches rather than level them. Heavy paint can hide a defect briefly, but it often leaves waves, filled-in details, and a finish that chips around edges. Another problem is skipping adhesion preparation. Interior plastics expand and flex with temperature changes, so a coating that looks good on day one can peel months later if the surface was not prepared correctly.
Household cleaners, protectants, and silicone-based dressings are another hidden issue. They can contaminate the panel and cause fisheyes or adhesion failure. So can touching a cleaned surface repeatedly with bare hands before spraying.
Finally, avoid rushing the cure and polish stages. A clear coat that feels dry is not always cured enough for aggressive sanding or machine polishing. Premature correction can create impressions, swelling, or loss of gloss that may require starting over.
Consider Restoration and Customization Together
When a trim piece is already being refinished, it is an opportunity to update the look of the cabin. Piano black can be restored to an OEM-style finish, color-matched to exterior paint, converted to carbon fiber, refinished in a satin black, or paired with restored leather, woodgrain, and steering wheel components.
The best choice depends on how the vehicle is used. High-gloss black delivers a premium, showroom-style appearance, but it will always show dust and fingerprints more readily than satin or textured finishes. A daily-driven vehicle may benefit from a less demanding finish, while a collector vehicle or custom build may justify the visual impact of deep piano black.
For complicated panels, Craft Customs can refinish original interior trim in-house, helping owners preserve fitment while receiving a finish built for the vehicle rather than a one-size-fits-all replacement.
A properly refinished piano black panel should make the interior feel composed again, not merely covered up. Keep it clean with a soft microfiber towel, avoid abrasive cleaners, and address new marks before repeated wiping turns light marring into a full correction job.