
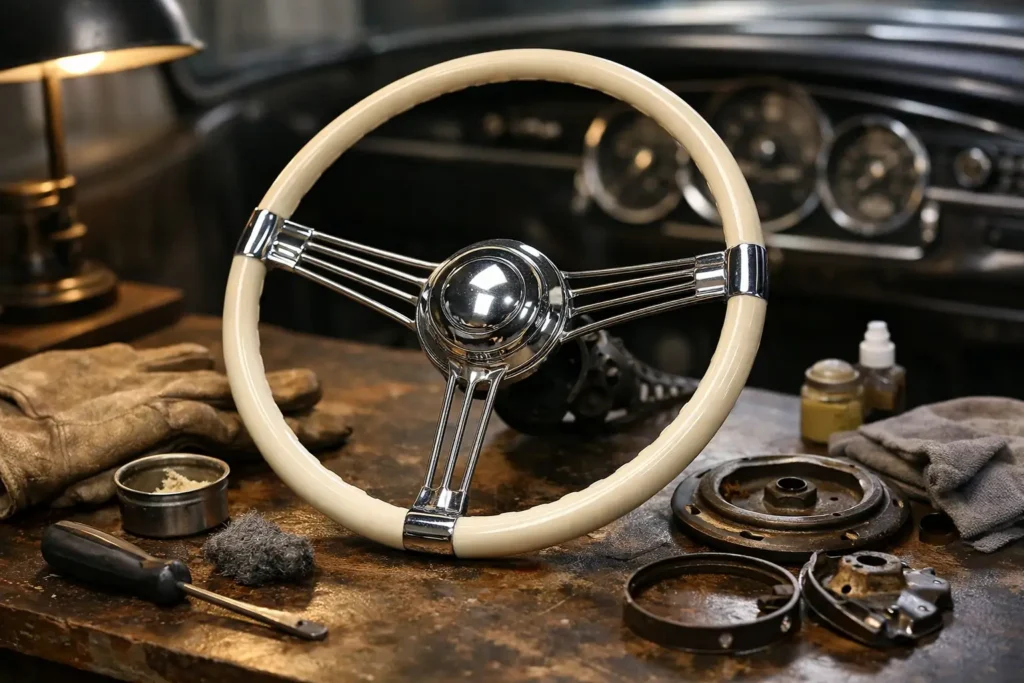
A vintage banjo steering wheel is one of the first details people notice when they sit behind the wheel of a classic car. Its thin rim, bright spokes, horn ring, and period-correct materials can make the entire interior feel special. But when the rim is cracked, the finish is yellowed, or the spokes are pitted, it can make an otherwise well-kept restoration look incomplete. To restore vintage banjo steering wheel components correctly, the work must protect both appearance and structural integrity.
What Makes Banjo Steering Wheels Different
The defining feature is the spoke design: several slender wire-like spokes that fan from the hub toward the rim, resembling the strings of a banjo. Depending on the vehicle and era, the rim may be painted plastic, Bakelite, hard rubber, wood, leather-wrapped material, or a combination of materials. The spokes and horn hardware are commonly chrome, stainless, aluminum, or plated pot metal.
That mix is why a one-size-fits-all repair rarely produces a convincing result. A 1930s hard-rubber wheel may need crack stabilization and carefully matched paint, while a mid-century wood-rim wheel may require veneer repair, grain work, stain matching, and a durable clear finish. A wheel from a luxury vehicle may also have delicate horn switches, trim rings, or emblems that need to be preserved during disassembly.
The goal is not simply to make the wheel shiny. A proper restoration should make it look appropriate for the car, feel solid in the hands, and hold up to normal use without hiding problems beneath a heavy cosmetic coating.
Inspect the Wheel Before Any Restoration Begins
Start with a close inspection under good lighting. Look beyond the obvious surface wear. Small cracks at the rim, loose spokes, failed hub material, and damaged horn-ring mounts can affect safety as well as appearance.
Surface crazing in old plastic or Bakelite can sometimes be repaired and refinished. Deep splits that move when the rim is flexed require more attention. A wheel with loose metal spokes, broken internal structure, or a compromised hub should not go back into service until it has been professionally evaluated. Cosmetic filler is not a structural repair.
Also inspect the horn button, emblem, trim ring, and mounting hardware. Original components are often difficult to replace, especially on low-production vehicles. Photograph the wheel from every angle before taking it apart, including the back side of the hub and the position of any contact plates, springs, or insulating pieces. These reference photos are valuable when it is time to reassemble the wheel.
Decide Between Preservation and Full Refinishing
Not every vintage banjo steering wheel should look brand new. For a survivor car with original paint, upholstery, and trim, preserving a light amount of honest patina may support the vehicle’s story and collector appeal. Gentle cleaning, stabilization, and small touch-ups may be the right choice.
A complete restoration makes more sense when the wheel has severe cracking, mismatched previous repairs, peeling finish, deep discoloration, damaged wood, or corrosion that distracts from the rest of the interior. It is also the better route when the cabin is being restored to factory-new condition or built around a custom color scheme.
This decision depends on the vehicle, its market, and how it will be used. A concours-level original car and a weekend cruiser do not always need the same finish. The best result is one that looks intentional beside the dash, seats, gauges, and interior trim.
How to Restore a Vintage Banjo Steering Wheel Correctly
Disassemble Without Damaging Original Parts
The wheel should be removed using the correct puller and protected from unnecessary force. Pulling on the rim or spokes can create damage that was not there before. Once removed, the horn button, trim, contact hardware, and any removable spoke covers should be carefully separated and organized.
Old steering wheels often contain brittle plastic, thin plating, and small hardware that is easy to lose. A restoration shop familiar with vintage interior components will document the assembly before work begins, protecting original pieces and identifying any parts that need repair before refinishing starts.
Repair the Rim at the Material Level
Cracks must be opened, cleaned, and stabilized before filler or finish is applied. Rushing this stage is a common reason restored wheels crack again after a few temperature cycles. The repair material must bond to the underlying rim, not simply bridge over damaged areas.
For plastic, Bakelite, and hard-rubber wheels, the surface is then shaped to restore the correct rim profile. The repaired areas should disappear into the original contours rather than leave flat spots, lumps, or visibly different sections around the wheel.
Wood-rim wheels require a different approach. Loose sections must be secured, damaged areas rebuilt, and the wood shaped before stain and clear finish are considered. Color matching matters, but so does preserving believable grain direction and the warmth of the original material.
Refinish for Correct Color and Sheen
A steering wheel finish takes more abuse than most interior parts. It sees hand oils, sunlight, temperature changes, jewelry, and constant friction. The refinishing system must be durable, but it also has to look right.
Many original wheels were not high-gloss. A finish that is too shiny can make a period wheel look plastic and out of place, while a finish that is too dull can look unfinished. Matching the original sheen, color, texture, and transition around the spokes produces the factory-style appearance collectors expect.
For custom builds, refinishing opens more options. A wheel can be color-matched to the dash, painted in a contrasting accent color, restored in rich wood tones, or reupholstered in leather or suede where the construction allows. Custom work should still respect the wheel’s shape and spoke pattern rather than bury those defining details.
Restore Metal Spokes and Horn Hardware Separately
The metalwork deserves its own process. Chrome pitting, dull aluminum, tarnished stainless, and failing pot-metal plating each require different treatment. Aggressive polishing can soften edges, remove detail, or expose weak plating, so the right method depends on the metal and the condition of the part.
Horn rings and buttons also need to operate correctly after restoration. Their contact surfaces, insulating components, springs, and mounting points should be checked before final assembly. A beautiful wheel with an inoperative horn button is not a completed restoration.
Reassemble and Test Before Installation
Once every piece is finished, the wheel should be reassembled with the correct spacing, hardware, and alignment. Test the horn function before the wheel is fully installed, then confirm that the wheel sits straight and the mounting hardware is properly secured.
Avoid overtightening fragile trim or old plastic components. If an original part is questionable, replacing unseen hardware or carefully repairing a mounting point can be a better long-term decision than forcing a damaged piece back into place.
Why DIY Repairs Often Fall Short
A do-it-yourself repair can be suitable for minor cleaning or a small, low-visibility touch-up. It becomes risky when the wheel has structural cracks, complicated horn hardware, valuable original trim, or a finish that needs to match the rest of a high-end restoration.
The usual shortcuts are easy to spot: crack repairs that telegraph through paint, thick coatings that erase the rim profile, incorrect gloss levels, overspray on spokes, and mismatched colors. These flaws matter because a steering wheel is viewed up close every time the car is driven.
Professional restoration is especially worthwhile for rare wheels, high-value vehicles, and parts with sentimental value. Craft Customs restores and refinishes original interior components in-house, allowing the rim, metal details, color, and final appearance to be handled as one coordinated project rather than a series of disconnected repairs.
Protect the Finished Wheel
After restoration, clean the wheel with a soft microfiber cloth and mild interior-safe cleaner. Avoid harsh solvents, strong degreasers, abrasive pads, and silicone-heavy dressings. Those products can dull the finish, leave residue, or affect grip.
Use a sunshade when the vehicle is parked, particularly if it has a light-colored or wood-finished wheel. Excessive heat and ultraviolet exposure are hard on vintage materials. If the car will sit for a long period, keep the interior dry and avoid tightly wrapping the wheel in plastic, which can trap moisture.
A properly restored banjo steering wheel should invite you to drive the car, not make you afraid to touch it. Choose a finish that fits the vehicle’s character, repair the underlying issues before they spread, and let the wheel become the finished detail that makes the entire interior feel complete.