
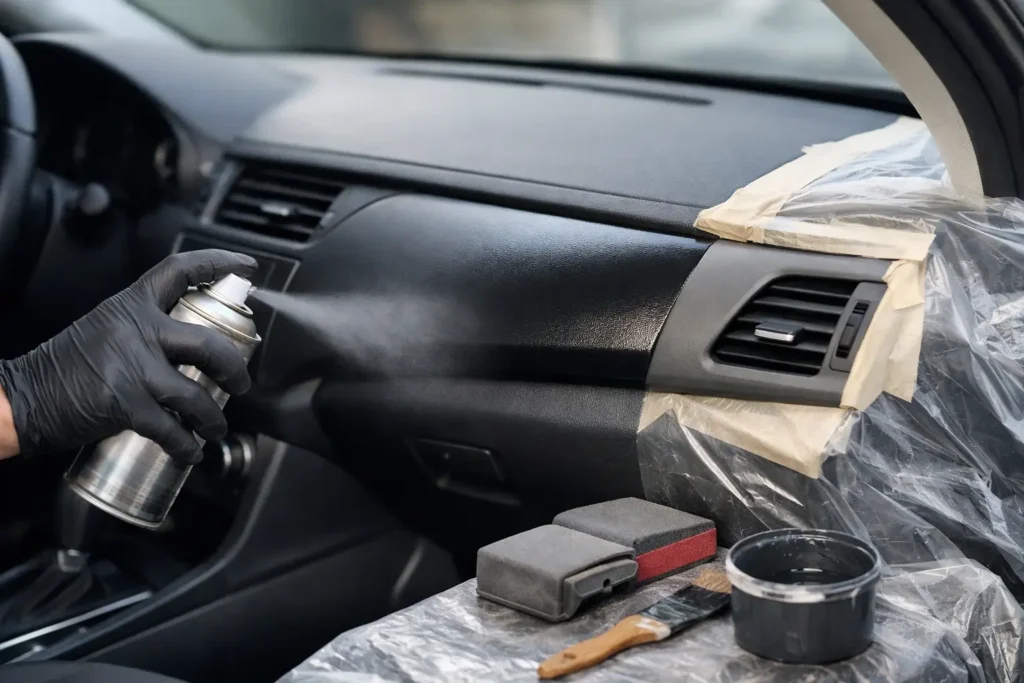
A scratched radio bezel or faded door trim can make an otherwise solid interior look tired fast. If you’re researching how to repaint interior plastic car trim, the good news is that plastic can be refinished successfully – but only when the prep, coating choice, and curing process are handled correctly. Most failures happen long before the color coat goes on.
Interior trim is different from exterior plastic. It sees less UV and weather, but it gets constant hand contact, cleaner residue, skin oils, rings, keys, and heat cycling from parked cars. That means the finish has to do more than just look good in the garage. It needs to bond well, flex with the substrate, and hold up without peeling, scratching easily, or turning blotchy around high-touch areas.
How to repaint interior plastic car trim without peeling
If you want a finish that lasts, think in layers. Cleaning removes contamination. Abrasion gives the surface tooth. Adhesion promoter helps the coating bite into the plastic. Primer builds consistency. Color creates the look. Clear coat, when appropriate, protects it. Skip one of those steps and the weak link usually shows up later.
The first decision is whether the part should be painted at all. Some interior pieces are better dyed, wrapped, hydro-dipped, refinished in woodgrain, or replaced with a custom finish entirely. A smooth ABS or polypropylene trim panel can often be painted well. A soft-touch panel with failing rubberized coating, however, usually needs that coating fully removed before any new finish has a chance. Textured pieces can also be tricky. Paint too heavily and the grain fills in, making the part look cheap or obviously refinished.
Start with the plastic itself
Not all interior plastics behave the same way. Hard molded trim around the dash, center console, pillar covers, and switch bezels is usually the easiest to refinish. Flexible parts need coatings that can move with them. Previously repaired or previously painted parts are the wildcard. If an older coating is already failing, anything you spray on top will only be as strong as the layer underneath.
That is why removal and inspection matter. Whenever possible, take the trim out of the vehicle before painting. Masking in place saves time up front, but it usually leads to rough edges, overspray, and missed contamination around seams. Once the part is on the bench, inspect it under good light. Look for silicone dressing residue, greasy fingerprints, scratches, gouges, and worn-through edges. Those details tell you how aggressive your prep needs to be.
Cleaning is where most DIY jobs are won or lost
Before sanding, strip off every trace of interior dressing, protectant, waxy cleaner, and skin oil. Use a dedicated wax and grease remover or a plastic-safe surface prep cleaner. Wipe on with one clean towel and wipe off with another before the solvent flashes contaminants back onto the surface. If the trim has years of glossy protectant buildup, one pass is rarely enough.
After that, wash the part with soap and water, rinse thoroughly, and dry it completely. Compressed air helps blow moisture out of seams, switch openings, and textured areas. If water is hiding in a crack and comes out during spraying, it can ruin the finish instantly.
Sanding creates bite, not deep damage
For most interior hard plastic trim, a gray scuff pad or fine sandpaper in the 600 to 800 grit range is enough to dull the surface without gouging it. The goal is uniform tooth. You are not trying to reshape the part unless you’re repairing scratches or damage.
If the panel has a failing soft-touch coating, peeling paint, or deep scuffs, you may need a more aggressive first pass to remove unstable material. Then refine the surface with finer grit before primer. Any shiny spots left behind can become weak spots for adhesion, while deep sanding scratches can print through the final color.
The right primer and adhesion promoter matter
Many interior trim pieces are made from low-surface-energy plastics that do not like accepting paint on their own. That is where an adhesion promoter comes in. It chemically helps the coating bond to the substrate rather than just sitting on top of it. If the product label says it is designed for automotive plastic, that is the category you want.
Apply light, even coats exactly within the product’s recommended flash window. Too much adhesion promoter can create its own problems, including a slick surface or solvent reaction with later coats. More is not better.
After that, use a primer suited to the surface condition and finish goal. If the part is smooth and already in excellent shape, you may only need a light primer coat. If it has repaired scratches or uneven color, a high-build primer can help level the appearance. Just remember that heavy primer on textured trim can soften or erase the original grain. For factory-style results, restraint matters.
Choosing color for interior trim
This is where many refinishing jobs start looking aftermarket. Interior color is rarely a simple flat black or generic gray. Even black interiors vary in gloss, undertone, and texture. A steering column shroud may have a different sheen than the dash bezel next to it. If you repaint one piece without matching the neighboring parts, the color difference can stand out immediately.
For that reason, the best approach is either a true color-matched coating or refinishing all visually connected pieces at the same time. Satin and low-sheen finishes usually look more OEM than full gloss on interior plastics, unless the original part was intentionally glossy piano black or similar. If the goal is a luxury or custom look, higher gloss can work well, but it has to be deliberate and consistent with the rest of the cabin.
Spray technique affects durability and appearance
Use light, controlled coats instead of trying to cover in one pass. Heavy coats are more likely to run, trap solvent, fill texture, and chip later. Start with a tack coat, then build color gradually. Keep the spray distance consistent and overlap evenly so the finish does not stripe or mottled-shade across the panel.
Temperature and humidity matter more than people think. If the shop or garage is too cold, the coating may not flow or cure properly. Too humid, and certain products can haze. Follow the coating system’s flash times between coats. Rushing this stage is one of the easiest ways to get lifting, wrinkling, or soft paint that fingerprints days later.
Do you need clear coat?
It depends on the product system and the finish you want. Some interior color coatings are designed as a one-stage finish with the correct sheen built in. Others perform better with a compatible clear coat on top, especially on high-contact trim or gloss-black pieces.
Clear can add protection, but it also changes the look. A clear coat may increase gloss, deepen color, and make the finish look richer. On the wrong part, though, it can make the panel look less factory-correct. For daily drivers and custom builds, added durability may be worth it. For concours-level restoration, matching original sheen usually matters more.
Curing, handling, and reassembly
Fresh paint may feel dry to the touch long before it is ready for use. Interior trim gets scratched during reinstallation more often than during normal driving. Let the parts cure fully based on the product instructions, and when in doubt, wait longer. Use clean gloves during reassembly, and avoid dragging screwdrivers or trim tools across new edges.
Clips and screw holes deserve extra care. Those high-stress areas can chip if the coating is too thick or not fully cured. If the part flexes significantly during installation, a coating system designed for flexible plastic is the safer choice.
When DIY works, and when a specialist is the better move
If the piece is relatively small, the plastic is stable, and you’re changing or restoring a straightforward finish, repainting at home can work well. The margin for error is smaller when the part is rare, expensive, heavily textured, color-sensitive, or part of a matched luxury interior. Piano black trims, woodgrain surrounds, metallic interior accents, and high-end dash components are especially unforgiving.
That is usually the point where professional refinishing makes more sense. A specialist can match sheen, control contamination, repair damage properly, and refinish multiple related pieces so the interior reads as one consistent design. For owners who care about factory-correct restoration or premium custom results, that precision is what separates a fresh-looking cabin from a part that always looks repainted.
At Craft Customs, we see this constantly – owners fix one worn trim piece, then realize the rest of the interior now needs to catch up. The best result is not just fresh color. It is a finish that belongs in the vehicle, holds up to real use, and makes the whole interior feel right again.
If you’re going to repaint interior plastic trim, take the extra time on prep, product compatibility, and cure time. Paint is the visible part, but craftsmanship is what makes it last.