
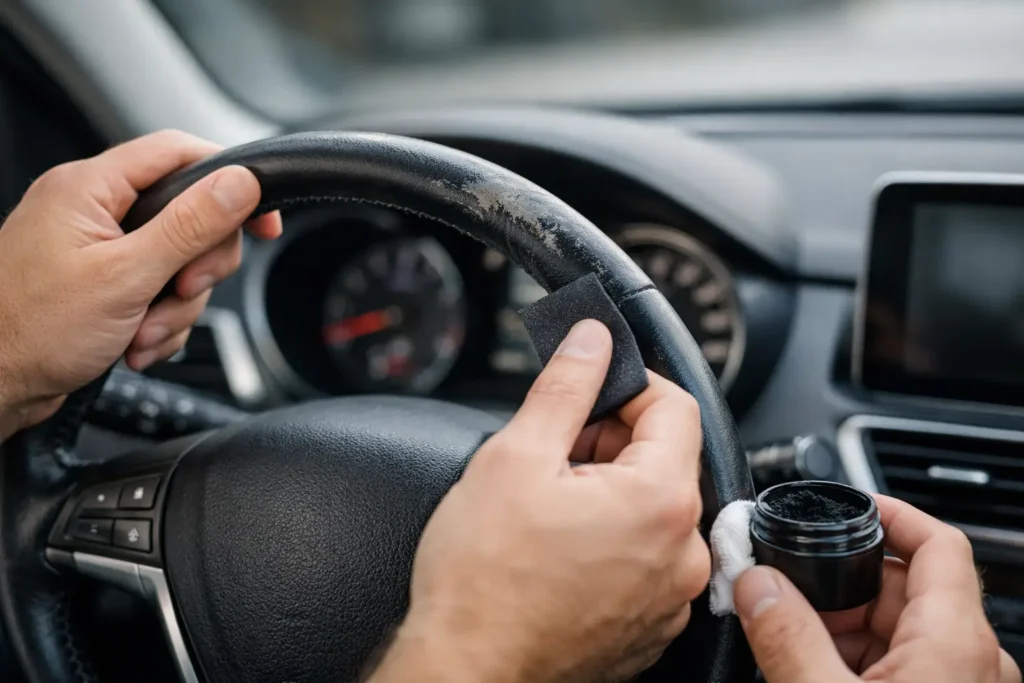
That sticky, flaking ring in your hands is more than a cosmetic problem. If you’re searching for how to fix peeling steering wheel finish, you’re usually dealing with one of two things: a failing topcoat on leather or vinyl, or a deteriorating painted, woodgrain, or synthetic trim layer that has started to lift, crack, or rub off. Either way, the wheel stops feeling right long before it looks completely ruined.
The hard truth is that not every peeling steering wheel can be saved with a quick wipe-on product. Some finishes fail because of skin oils, sun exposure, hand sanitizer, and years of friction. Others fail because the original coating was thin, the material underneath is breaking down, or a past repair was done with the wrong prep. The right fix depends on what is actually peeling and how deep the damage goes.
What causes a steering wheel finish to peel?
Most steering wheels fail from repeated contact, not sudden damage. Oils from your hands soften the finish over time. Heat and UV exposure dry it out. Cleaners that are too harsh, especially anything with strong solvents, can strip away protective coatings. Once the surface starts to break, every drive makes it worse.
On leather-wrapped wheels, the peeling may be the dyed topcoat rather than the leather itself. That is important, because worn color can sometimes be refinished if the underlying leather is still structurally sound. If the leather is cracked, loose, hardened, or splitting at the seams, refinishing alone will not hold up.
On plastic, woodgrain, or painted trim sections, peeling often means the clear coat or decorative layer has lost adhesion. In those cases, the problem is usually less about touch-up and more about removing failed material and rebuilding the finish correctly.
How to fix peeling steering wheel finish without making it worse
Before you reach for a repair kit, inspect the wheel closely in natural light. If the surface feels tacky, powdery, or uneven, that points to finish failure. If you can see exposed substrate, deep cracking, missing chunks, or loose wrap material, the repair is already beyond a simple cosmetic touch-up.
A lot of DIY damage starts with aggressive sanding or heavy cleaners. That can turn a repairable wheel into one that needs full rewrapping or structural refinishing. Start conservatively. Clean first, test small, and stop if the finish comes off on your cloth in large amounts.
Step 1: Clean the wheel properly
Use a mild interior-safe cleaner and a soft microfiber towel. The goal is to remove body oils, silicone residue, and grime without stripping more finish. Avoid magic erasers, lacquer thinner, acetone, and household degreasers. Those products can cut through a failing coating fast, but they also make the final repair less predictable.
If the wheel is leather, use a proper leather prep cleaner or gentle leather-safe product. If it is painted plastic or woodgrain trim, use a mild surface cleaner and avoid soaking seams or switch areas.
Step 2: Determine if you’re dealing with minor wear or true peeling
Minor wear usually looks dull, smooth, and discolored. True peeling has lifted edges, flakes, rough texture, or sections where the top finish is separating. Minor wear can sometimes be corrected with a refinishing dye or color restoration system. True peeling usually requires more surface prep and, in many cases, complete refinishing of the affected area for a uniform result.
This is where expectations matter. Spot repairs on a high-contact part like a steering wheel can stand out if the sheen, texture, or color is even slightly off. Dark colors are easier to blend than light beige, gray, red, or factory-specific tones.
Step 3: Remove only the unstable material
If a section is actively flaking, the loose finish needs to come off. Do not gouge or dig into the base material. Use a soft plastic scraper or careful hand prep to lift only what has already failed. On some wheels, lightly feathering the edge with very fine abrasive can help, but over-sanding is a common mistake. Once you flatten texture or break through surrounding color, the repair area grows fast.
For leather wheels, this step has to be especially controlled. You are not trying to sand the leather down. You are trying to remove failing topcoat and smooth transition lines so new material can bond.
Step 4: Rebuild the surface if needed
If peeling left pits, rough edges, or shallow material loss, a flexible filler may be needed before color is reapplied. This is common on coated leather and some synthetic wheels. The filler has to remain flexible after curing. If it dries hard or brittle, it will crack again with regular use.
On painted or woodgrain sections, rebuilding can involve primer, color, and clear. On leather, it may involve a flexible repair compound followed by color matching and a protective topcoat. The exact process depends on the material, which is why one universal kit rarely gives great results across every wheel type.
When a DIY repair can work
DIY makes sense when the peeling is light, the wheel is otherwise solid, and you’re comfortable accepting a good improvement rather than a factory-new result. Daily drivers with small worn spots are the best candidates. If the wheel has sentimental or collector value, the standard should be much higher.
A decent DIY repair usually requires patience more than expensive products. Surface prep, color matching, and curing time matter more than speed. Rushing the job is what causes fresh repairs to get sticky, shiny, or uneven after a few weeks.
If you attempt it yourself, keep the repair limited to cosmetic topcoat issues. Once stitching is damaged, leather is shrinking, padding feels uneven, or hard trim is delaminating, the finish is no longer the only problem.
When professional restoration is the better move
There is a point where repairing the peel is less effective than restoring the entire wheel. That point comes sooner on luxury vehicles, classics, exotics, and any interior where mismatched sheen or color will be obvious every time you open the door.
Professional restoration is usually the right call when the wheel has widespread peeling, hardened leather, damaged seams, faded top and sides, failed woodgrain clear, or previous DIY repairs that already altered the surface. A proper shop can strip unstable coatings, correct the substrate, match the original color and gloss, and rebuild the wheel so it feels right in the hand again.
That matters because a steering wheel is not just another trim piece. It is the most touched surface in the cabin. If the texture is wrong, the wheel will always feel repaired. If the color is wrong, the whole interior can look older than it is.
For customers who want the result to look factory-correct or better than factory, a specialist service is often the cleaner path. Craft Customs handles steering wheel refinishing, leather restoration, custom rewrapping, woodgrain refinishing, and trim restoration in-house, which is the level of control these repairs often need.
What not to do when the finish is peeling
The fastest way to ruin a repair is to confuse coverage with restoration. Thick paint, generic vinyl spray, or heavy clear coat can hide damage for a moment, but they rarely survive daily use on a steering wheel. The wheel flexes, heats up, absorbs oils, and sees constant abrasion.
Wrapping over a failing finish is also risky unless the original surface is stabilized first. An aftermarket cover can mask the problem, but if the base continues to break down underneath, the feel gets worse and the damage keeps spreading.
Another common mistake is trying to touch up one small section when the rest of the wheel is already thin and worn. That usually creates a patch that is technically fixed but visually obvious.
How to keep the finish from peeling again
Once the wheel is repaired, maintenance becomes simple. Clean it regularly with a safe interior or leather cleaner, not harsh degreasers. Keep sunscreen, hand sanitizer, and solvent residue off the surface when possible. If the vehicle spends a lot of time in the sun, use a windshield shade or covered parking when you can.
If the wheel is leather, occasional conditioning may help, but only with products made for coated automotive leather. Too much product, or the wrong product, can leave buildup that attracts dirt and breaks down the topcoat. Clean hands do more for steering wheel longevity than most dressings ever will.
A peeling steering wheel finish makes an otherwise solid interior feel worn out every time you drive. The good news is that many wheels can be improved, and some can be fully restored, but the result depends on choosing the right repair level at the start. If the damage is light, careful prep and refinishing may be enough. If the wheel is valuable, heavily worn, or already compromised, a professional restoration will usually save time, money, and disappointment in the long run.